Phaser. Unit 8. Dino game clone (part II)

Introduction

In this unit we will build a clone of Google Chrome “secret” Dino game (the original game can be revealed by entering “chrome://dino” in the address bar). We will use simple web technologies such as HTML, CSS, JavaScript and Phaser 3, so that any user can play on any device just using any browser (not only Chrome).

The result is a game which looks almost the same as the original one using less than 10% lines of code. As it can be seen from the Chromium source code, the original game is made of more than 4000 lines of code, whereas the one in this unit has been developed using around 300 lines of code. This means that Phaser could be a much better option than simple JavaScript when thinking about game development.

Some features

This version of the game clones almost every feature of the original one:

  • The speed of the game is increased gradually.
  • Both cactuses and birds will appear randomly to hurt you.
  • Two scores are shown: current and highest.
  • Each time the user reaches 100 points, the score blinks and a sound is played.
  • It can be played on desktop computers using both the mouse and the keyboard:
    • By clicking on the screen to jump or to restart the game.
    • Using the up arrow key or the space bar to jump, the down arrow key to duck under the enemy, and the enter key to restart the game.
  • It can be played on mobile devices by touching the screen, the same way as any single button game.
  • The game is automatically adjusted to fit the screen size, even if it changes after the page is loaded (for example, in case the user rotates the device).
  • Vibration is activated on mobile devices when the game over screen appears.

CSS code (styles.css)

We are going to insert some CSS code to remove any margin and padding, and also to remove the scrollbars, so that the whole window size is used when the game is started:

html, body {
  margin: 0px;
  padding: 0px;
  overflow: hidden;
  height: 100%;
}

HTML code (index.html)

We are going to use a single HTML file to link all the files in the project. This is going to be the “index.html” file:

<!DOCTYPE html>
<html lang="en">

<head>
  <meta charset="utf-8">
  <meta name="description" content="Dino game clone using Phaser">
  <meta name="keywords" content="HTML, CSS, JavaScript, Phaser">
  <meta name="author" content="Fernando Ruiz Rico">
  
  <title>Dino Phaser</title>

  <link href="styles.css" rel="stylesheet">
</head>

<body>
  <script src="https://cdn.jsdelivr.net/npm/[email protected]/dist/phaser.min.js"></script>
  <script src="preload.js"></script>
  <script src="create.js"></script>
  <script src="update.js"></script>
  <script src="config.js"></script>
</body>

</html>

Constants and Phaser configuration (config.js)

We are going to define some constants (i.e. screen width and height and text styles) so that we can use them inside every JavaScript file. We will also define a function to set the initial values of some variables before the game is started, together with the usual Phaser configuration, which must be performed as usual.

Moreover we are adding a piece of code to check whether the screen is being resized (i.e. when the device is rotated or the window size is adjusted) so that the whole game is reloaded to fit the new values of the screen width and height.

const WIDTH = window.innerWidth;
const HEIGHT = window.innerHeight;

const TEXT_STYLE = { fill: "#535353", font: '900 35px Courier', resolution: 10 };

function initVariables() {
  this.isGameRunning = false;
  this.gameSpeed = 10;
  this.respawnTime = 0;
  this.score = 0;
}

const config = {
  type: Phaser.AUTO,
  width: WIDTH,
  height: HEIGHT,
  pixelArt: true,
  transparent: true,
  physics: {
    default: 'arcade',
    arcade: {
      debug: false
    }
  },
  scene: { preload: preload, create: create, update: update }
};

let game = new Phaser.Game(config);

let resizing = false;
window.addEventListener('resize', () => {
  if (resizing) clearTimeout(resizing);
  resizing = setTimeout(() => window.location.reload(), 500);
});

The assets

We will need some images, sprites and sounds. You may use any assets you like, but we are providing the original ones so that you can easily develop the same game as the one available in Google Chrome. Some examples are shown below, and also a zip file containing all the assets can be downloaded here.

Images

Cloud
Cactuses
Game over
Restart

Sprites

Dino waiting and running
Dino down
Bird enemy

Sounds

Hit
Jump
Reach

Loading all the assets (preload.js)

So that we can use all those images, sprites and sounds, they have to be loaded previously. That is the purpose of the “preload()” function.

Inside the “initSounds()” and “createAnims()” we will set the volume of the sounds and the frames of the animations respectively.

function preload() {
  this.load.audio('jump', 'assets/jump.m4a');
  this.load.audio('hit', 'assets/hit.m4a');
  this.load.audio('reach', 'assets/reach.m4a');

  this.load.image('ground', 'assets/ground.png');
  this.load.image('dino-idle', 'assets/dino-idle.png');
  this.load.image('dino-hurt', 'assets/dino-hurt.png');
  this.load.image('restart', 'assets/restart.png');
  this.load.image('game-over', 'assets/game-over.png');
  this.load.image('cloud', 'assets/cloud.png');

  this.load.image('obsticle-1', 'assets/cactuses_small_1.png');
  this.load.image('obsticle-2', 'assets/cactuses_small_2.png');
  this.load.image('obsticle-3', 'assets/cactuses_small_3.png');
  this.load.image('obsticle-4', 'assets/cactuses_big_1.png');
  this.load.image('obsticle-5', 'assets/cactuses_big_2.png');
  this.load.image('obsticle-6', 'assets/cactuses_big_3.png');

  this.load.spritesheet('dino', 'assets/dino-run.png', { frameWidth: 88, frameHeight: 94 });
  this.load.spritesheet('dino-down', 'assets/dino-down.png', { frameWidth: 118, frameHeight: 94 });
  this.load.spritesheet('enemy-bird', 'assets/enemy-bird.png', { frameWidth: 92, frameHeight: 77 });
}

function initSounds() {
  this.jumpSound = this.sound.add('jump', { volume: 0.75 });
  this.hitSound = this.sound.add('hit', { volume: 0.75 });
  this.reachSound = this.sound.add('reach', { volume: 0.75 });
}

function createAnims() {
  this.anims.create({
    key: 'dino-waiting',
    frames: this.anims.generateFrameNumbers('dino', { start: 0, end: 1 }),
    frameRate: 1,
    repeat: -1
  })

  this.anims.create({
    key: 'dino-run',
    frames: this.anims.generateFrameNumbers('dino', { start: 2, end: 3 }),
    frameRate: 10,
    repeat: -1
  })

  this.anims.create({
    key: 'dino-down-anim',
    frames: this.anims.generateFrameNumbers('dino-down', { start: 0, end: 1 }),
    frameRate: 10,
    repeat: -1
  })

  this.anims.create({
    key: 'enemy-bird-anim',
    frames: this.anims.generateFrameNumbers('enemy-bird', { start: 0, end: 1 }),
    frameRate: 6,
    repeat: -1
  })
}

Creating the scores, the clouds, the dino, and the game over message (create.js)

  • Scores: Two boxes are used to print both the current and highest scores on the right hand side of the screen.
  • Clouds: A loop will be used to create 3 clouds at once printing the same image on random positions.
  • Dino: The dino will collide with the ground below, and it will jump using the keys defined here (in our case we will use both the up cursor key and the space bar). The mouse functionality is already available by default.
  • Game over: A message will be shown when the user collides with either the birds or the cactuses. After the user clicks on it, this message will be hidden using the “setAlpha(0)” function call.
function initColliders() {
  this.physics.add.collider(this.dino, this.obsticles, () => {
    initVariables.call(this);
    updateHighScore.call(this);
    this.hitSound.play();
    this.physics.pause();
    this.anims.pauseAll();
    this.dino.setTexture('dino-hurt');
    this.gameOverScreen.setAlpha(1);
    if (window.navigator.vibrate) window.navigator.vibrate(50);
  }, null, this);
}

function createScore() {
  this.scoreText = this.add.text(WIDTH - 25, HEIGHT / 3, "", TEXT_STYLE).setOrigin(1, 1);
  this.highScoreText = this.add.text(0, HEIGHT / 3, "", TEXT_STYLE).setOrigin(1, 1).setAlpha(0.75);
}

function createClouds() {
  this.clouds = this.add.group();
  for (let i = 0; i < 3; i++) {
    const x = Phaser.Math.Between(0, WIDTH);
    const y = Phaser.Math.Between(HEIGHT / 3, HEIGHT / 2);
    this.clouds.add(this.add.image(x, y, 'cloud'));
  }
  this.clouds.setAlpha(0);
}

function createDino() {
  this.dino = this.physics.add.sprite(0, HEIGHT / 1.5, 'dino-idle').setSize(50).setGravityY(5000).setOrigin(0, 1);
  this.dino.play('dino-waiting', true);
  this.physics.add.collider(this.dino, this.belowGround);
  this.cursors = this.input.keyboard.createCursorKeys();
  this.spaceBar = this.input.keyboard.addKey(Phaser.Input.Keyboard.KeyCodes.SPACE);

  this.startText = this.add.text(WIDTH - 15, HEIGHT / 1.5, "Press to play", TEXT_STYLE).setOrigin(1);
}

function createGameOverScreen() {
  this.gameOverText = this.add.image(0, 0, 'game-over');
  this.restart = this.add.image(0, 50, 'restart').setInteractive();
  this.gameOverScreen = this.add.container(WIDTH / 2, HEIGHT / 2 - 50).setAlpha(0);
  this.gameOverScreen.add([this.gameOverText, this.restart]);
  this.enter = this.input.keyboard.addKey(Phaser.Input.Keyboard.KeyCodes.ENTER);

  this.restart.on('pointerdown', () => restartGame.call(this));
}

function createWorld() {
  this.ground = this.add.tileSprite(0, HEIGHT / 1.5, 88, 26, 'ground').setOrigin(0, 1);
  this.belowGround = this.add.rectangle(0, HEIGHT / 1.5, WIDTH, HEIGHT / 3).setOrigin(0, 0);
  this.physics.add.existing(this.belowGround);
  this.belowGround.body.setImmovable();
  this.obsticles = this.physics.add.group();
}

function create() {
  initVariables.call(this);

  initSounds.call(this);
  createAnims.call(this);
  createWorld.call(this);
  createClouds.call(this);
  createScore.call(this);
  createDino.call(this);
  initColliders.call(this);
  createGameOverScreen.call(this);

  setInterval(() => updateScore.call(this), 100);
}

Controlling the player and displaying the birds and the cactuses (update.js)

  • Starting the game and building the ground: The “startGame()” method will build the ground progresively, just once, when the game is started the very first time.
  • Restarting the game: After the game over message appears, the user may click on the screen to start a new game. This is done inside the “restartGame()” method, which hides the message using the “setAlpha(0)” method call, restarts the score and resumes all the physics.
  • Updating the scores: The function “updateScore()” will not only update the current score, but it will also increment the game speed, and it will play a sound each time the user reaches 100 points, making the numbers blink at the same time. The “updateHighScore()” function will keep a record of the highest score each time a game is over.
  • Placing and moving the birds and the cactuses: The “placeObsticle()” function will create either birds or cactuses randomly, and the “update()” function will move everything to the left except the dino, which will always remain in the same position.
function startGame() {
  this.startText.destroy();
  this.dino.setVelocityX(80);
  this.dino.play('dino-run', 1);

  function buildGround() {
    this.ground.width += (WIDTH / 100);
    if (this.ground.width > WIDTH) {
      clearInterval(interval);
      this.isGameRunning = true;
      this.ground.width = WIDTH;
      this.dino.setVelocityX(0);
      this.scoreText.setAlpha(1);
      this.clouds.setAlpha(1);
    }
  }
  const interval = setInterval(() => buildGround.call(this), 15);
}

function restartGame() {
  this.dino.setVelocityY(0);
  this.dino.body.height = 92;
  this.dino.body.offset.y = 0;
  this.physics.resume();
  this.anims.resumeAll();
  this.obsticles.clear(true, true);
  this.gameOverScreen.setAlpha(0);
  this.isGameRunning = true;
}

function updateScore() {
  if (!this.isGameRunning) return;

  this.score++;
  this.gameSpeed += 0.01;

  if (this.score % 100 == 0) {
    this.reachSound.play();

    this.tweens.add({
      targets: this.scoreText,
      duration: 100,
      repeat: 3,
      alpha: 0,
      yoyo: true
    })
  }

  this.scoreText.setText(("0000" + this.score).slice(-5));
}

function updateHighScore() {
  this.highScoreText.x = this.scoreText.x - this.scoreText.width - 30;

  const highScore = this.highScoreText.text.substr(this.highScoreText.text.length - 5);
  const newScore = Number(this.scoreText.text) > Number(highScore) ? this.scoreText.text : highScore;

  this.highScoreText.setText(`HI ${newScore}`);
}

function placeObsticle() {
  let obsticle;
  const obsticleNum = Phaser.Math.Between(1, 7);

  if (obsticleNum > 6) {
    obsticle = this.obsticles.create(WIDTH, HEIGHT / 1.5 - Phaser.Math.Between(20, 50), 'enemy-bird');
    obsticle.body.height /= 1.5
    obsticle.play('enemy-bird-anim', 1);
  } else {
    obsticle = this.obsticles.create(WIDTH, HEIGHT / 1.5, `obsticle-${obsticleNum}`)
  }

  obsticle.setOrigin(0, 1).setImmovable();
}

function update(time, delta) {
  if (this.isGameRunning) {
    this.ground.tilePositionX += this.gameSpeed;

    this.respawnTime += delta * this.gameSpeed * 0.08;
    if (this.respawnTime >= 1500) {
      placeObsticle.call(this);
      this.respawnTime = 0;
    }

    this.obsticles.getChildren().forEach(obsticle => {
      obsticle.x -= this.gameSpeed;
      if (obsticle.getBounds().right < 0) {
        this.obsticles.killAndHide(obsticle);
      }
    })

    this.clouds.getChildren().forEach(cloud => {
      cloud.x -= 0.5;
      if (cloud.getBounds().right < 0) {
        cloud.x = WIDTH;
      }
    })
  }
  else if (this.gameOverScreen.alpha && this.enter.isDown) {
    restartGame.call(this);
  }

  if (this.dino.body.onFloor() && !this.dino.body.velocity.x && !this.gameOverScreen.alpha &&
    (this.cursors.up.isDown || this.spaceBar.isDown || this.input.activePointer.isDown)) {
    this.jumpSound.play();
    this.dino.anims.stop();
    this.dino.setVelocityY(-1600);
    this.dino.setTexture('dino', 0);

    if (!this.isGameRunning) startGame.call(this);
  }
  else if (this.isGameRunning) {
    if (this.cursors.down.isDown) {
      this.dino.play('dino-down-anim', true);
      this.dino.body.height = 58;
      this.dino.body.offset.y = 34;
    }
    else {
      this.dino.play('dino-run', true);
      this.dino.body.height = 92;
      this.dino.body.offset.y = 0;
    }
  }
}

Proposed exercise: Using your own assets

Create a new version of the Dino game using your own assets (images, sprites and sounds). You can also change any other things you like.

Do not forget to create all the files required to run the code in this unit:

  • styles.css
  • index.html
  • preload.js
  • create.js
  • update.js
  • config.js
  • assets folder

You may find many free assets in OpenGameArt, and some new versions of the Dino game in github:

Enjoy the game!

You can enjoy playing this wonderful game online here.

Phaser 3 game examples written in TypeScript

Play the games

Alpha adjust

Alpha adjust

Asteroid

Asteroid

Blockade

Blockade

Blocks

Blocks

Breakout

Breakout

Candy Crush

Candy Crush

Clocks

Clocks

Coin runner

Coin runner

Endless runner

Endless runner

Flappy Bird

Flappy Bird

Snake

Snake

Space Invaders

Space Invaders

Super Mario Land

Super Mario Land

Tank

Tank

Run the games in your computer

Since all the games are open source, you can run all the games in your own computer. Just follow these steps:

  1. Install Nodejs (in case you don’t have it yet).
  2. Download the zip file containing the source code of the game you like.
  3. Open a terminal inside the project folder.
  4. Execute “npm install”.
  5. Execute “npm run dev”.
  6. Open the address “http://localhost:8080/” on your browser.

You can download the source code from the following links:

More information

You will find more information on github.

Phaser. Unit 9. Drawing maps from plain text

Introduction

In this unit we will define a simple Phaser game that can be used as a template to define an unlimited number of levels, enemies and objects. The map will be drawn from a simple array of tiles where several characters will be used to choose the positions of each item.

We will also use npm and webpack to provide a friendly development environment, so that the application will be automatically compiled and restarted each time a file is changed. A web server is also provided by webpack to test the application, and a production version of the code can be also obtained to upload it to any public server.

Some features

These are some of the features to be implemented:

  • Show several types of animated objects that can be collected individually.
  • Keep several counters with the number of the items collected.
  • Show several types of animated enemies that can be killed just by jumping over them.
  • Move automatically the enemies from left to right and viceversa using spritesheets that contain only a single direction.
  • Draw the map using plain characters that are matched againt tiles, objects, enemies, player, and goal.
  • Easily define an unlimited number of levels and let the player jump from one level to the other just by reaching a goal in the map.
  • Display a minimap automatically generated from the real sized map.
  • Play a different background music for each level, and a different sound when either objects are collected or enemies are killed.
  • Allow the user to play the game on mobile phones and tablets with touch controls to jump and also to activate both left and right movements.
  • Implement PWA features to let the users install the application in mobile devices and also to lock the screen in landscape mode.
  • Adjust the game automatically to the size of the window where the game is displayed, and also after the window is resized on desktop computers.

Loading the assets (src/scripts/scenes/preloadScene.ts)

Inside this file we will load all the assets (both audio and images) so that they are ready to be played or displayed after the game is started:

import Levels from "../components/levels/levels"

export default class PreloadScene extends Phaser.Scene {
  constructor() {
    super({ key: 'PreloadScene' })
  }

  preload() {
    const images = ['tile-left', 'tile-middle', 'tile-right', 'tile-single', 'controls', 'background', 'goal']
    images.forEach(img => {
      this.load.image(img, `assets/img/${img}.png`)
    })

    this.load.spritesheet('player', 'assets/img/player.png', { frameHeight: 165, frameWidth: 120 })
    this.load.spritesheet('coin', 'assets/img/coin.png', { frameHeight: 42, frameWidth: 42 })
    this.load.spritesheet('key', 'assets/img/key.png', { frameHeight: 176, frameWidth: 176 })
    this.load.spritesheet('bee', 'assets/img/bee.png', { frameHeight: 100, frameWidth: 128 })
    this.load.spritesheet('slime', 'assets/img/slime.png', { frameHeight: 68, frameWidth: 112 })
    // @ts-ignore
    this.load.spine('boy', 'assets/spine/boy.json', 'assets/spine/boy.atlas')

    const audios = ['bee', 'slime', 'coin', 'key', 'door', 'hurt', 'music']
    audios.forEach(audio => {
      this.load.audio(audio, `assets/audio/${audio}.mp3`)
    })

    for(let i=0; i<Levels.length; i++) {
      this.load.audio(`level${i}`, `assets/audio/level${i}.mp3`)
    }
  }

  create() {
    this.scene.start('MainScene')
  }
}

Drawing the map and placing everything on it

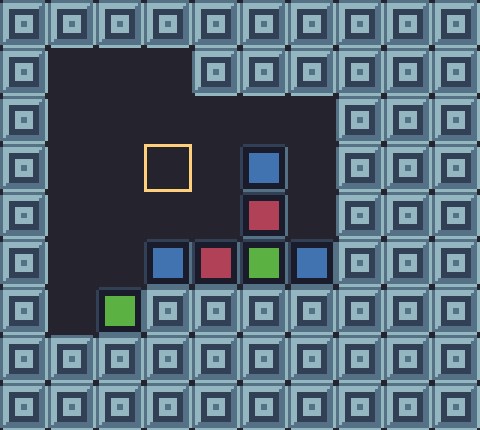
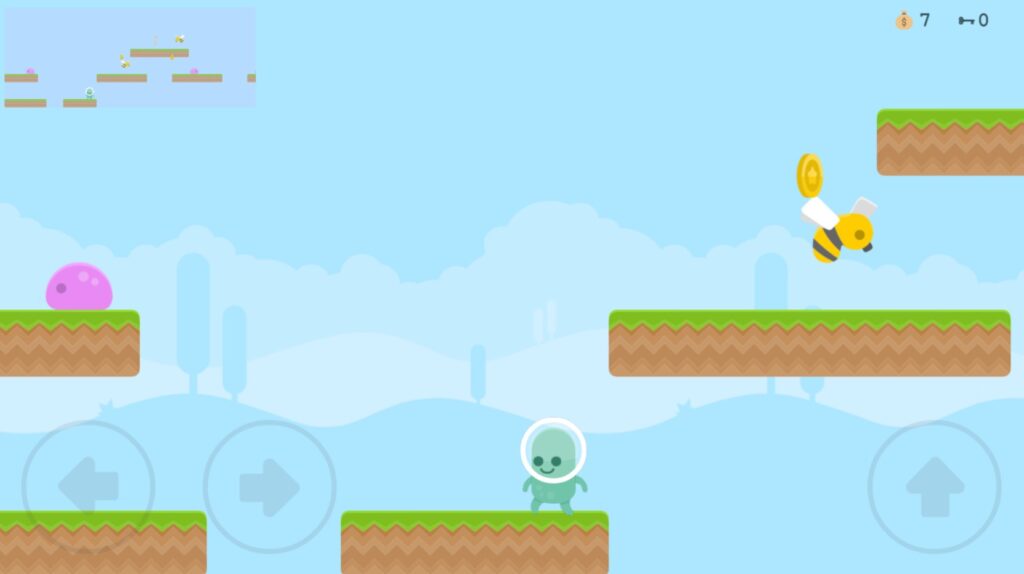
We will use plain characters to represent the player, the goal, the objects, the enemies and the ground:

  • P: Player
  • G: Goal (the door to jump to the next level)
  • Objects:
    • C: Coin
    • K: Key (at least 1 key is required to open the door to the next level)
  • Enemies:
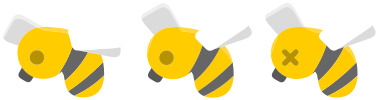
    • B: Bee (a flying enemy)
    • S: Slime (an enemy crawling on the ground)
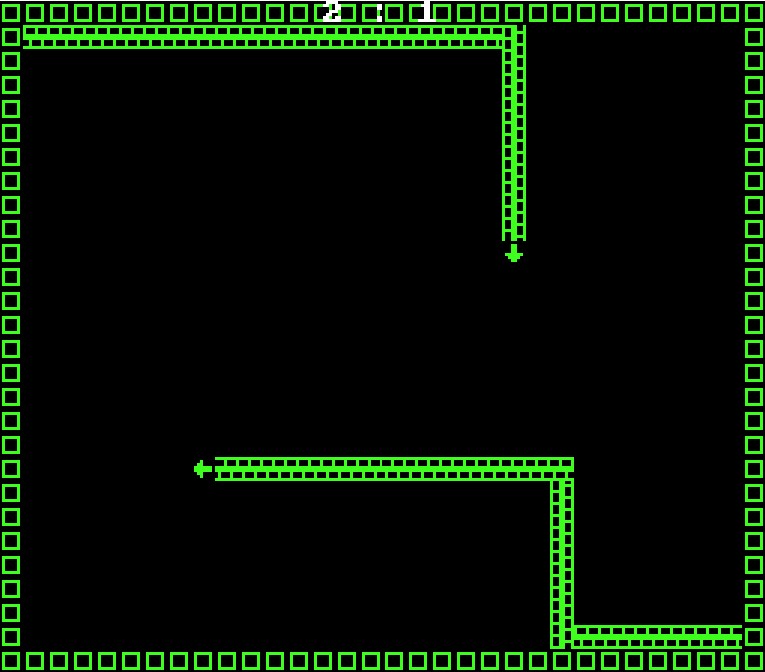
  • [//////]: The ground

Defining the levels (src/scripts/components/levels/levels.ts)

As it can be seen in the “levels.ts” file, the map of each level can be easily defined using simple characters. We can also place all the enemies, objects, player and goal at any position in the map:

type Level = string[]

// prettier-ignore
const level0: Level = [
  '   K    S       ',
  '  [/////]       ',
  '                ',
  '   P         G  ',
  '[/////]   [////]',
]

// prettier-ignore
const level1: Level = [
  '               B  K                   ',
  '               [/////]                ',
  '              C     C                 ',
  '   S        B            S    S    G  ',
  '[//]       [////]   [////]   [//////] ',
  '    C   C                             ',
  ' P        B                           ',
  '[///]  [//]                           ',
]

// prettier-ignore
const level2: Level = [
  ' P                     [//]       G   ',
  '[/]    C   B        C           [/]   ',
  '         [//]     [//]                ',
  '      S                     B  B      ',
  ' C  [//]      B            [///]      ',
  '            [///]     []  C        C  ',
  '[]        K                           ',
  '         [/]            [/]      [/]  '
]

// prettier-ignore
const level3: Level = [
  '       C                                    ',
  '                      C                 C   ',
  '      [///]                 C      [////]   ',
  '           [///]       S  [//]  K           ',
  '                   [///]      [///]         ',
  '             S                              ',
  '         [///]           C              G   ',
  '      C            C               [////]   ',
  '  P                     S  B                ',
  '[//////]       [///]  [////]                '
]

// prettier-ignore
const level4: Level = [
  '                        C  C         S                                  ',
  '                                 [//////]      K     B               G  ',
  '                  C    [/////]                [///////]          [////] ',
  '                                                                        ',
  '  P      S     B    B              C       S     S         S            ',
  '[////////]  [///////]             [/]    [////////////////////]         '
]

const Levels: Level[] = [level0, level1, level2, level3, level4]
export default Levels

Matching characters to textures (src/scripts/components/map/map.ts)

In case we want to add new enemies or objects, we will have to match a new character against the new texture:

import Levels from '../levels/levels'
export class Map {
  info: TilesConfig[]
  size: MapSize

  public static calcCurrentLevel(currentLevel: number) {
    const MAX_LEVELS = Levels.length
    return currentLevel % MAX_LEVELS
  }

  constructor(currentLevel: number) {
    const TILE_SIZE = 96
    const config: any = {
      '[': {
        type: 'tile',
        texture: 'tile-left'
      },
      '/': {
        type: 'tile',
        texture: 'tile-middle'
      },
      ']': {
        type: 'tile',
        texture: 'tile-right'
      },
      'G': {
        type: 'goal',
        texture: 'goal'
      },
      'C': {
        type: 'object',
        texture: 'coin'
      },
      'K': {
        type: 'object',
        texture: 'key'
      },      
      'S': {
        type: 'enemy',
        texture: 'slime'
      },
      'B': {
        type: 'enemy',
        texture: 'bee'
      },
      'P': {
        type: 'player',
        texture: 'player'
      }
    }

    const map = Levels[Map.calcCurrentLevel(currentLevel)]

    // the player can jump a bit higher than the map's height
    const paddingTop = 4 * TILE_SIZE

    this.size = {
      x: 0,
      y: 0,
      width: map[0].length * TILE_SIZE,
      height: map.length * TILE_SIZE + paddingTop
    }
    this.info = []

    map.forEach((row, y) => {
      for (let i = 0; i < row.length; i++) {
        const tile = row.charAt(i)
        const x = i
        if (tile !== ' ') {
          let info = { ...config[tile.toString()], x: x * TILE_SIZE, y: y * TILE_SIZE + paddingTop }
          this.info.push(info)
        }
      }
    })
  }
}

Enemies (src/scripts/components/enemies/enemiesGroup.ts)

All the tiles in the map are read and the enemies are created depending on the texture field:

import BeeSprite from './bee'
import SlimeSprite from './slime'

export default class EnemiesGroup extends Phaser.GameObjects.Group {
  tiles: TilesConfig[]
  TILE_SIZE = 96
  constructor(scene: Phaser.Scene, tilesConfig: TilesConfig[]) {
    super(scene)

    this.tiles = tilesConfig.filter(tile => tile.type === 'tile')
    let enemyTypes = tilesConfig.filter(tile => tile.type === 'enemy')

    let enemies: Array<BeeSprite | SlimeSprite> = []
    enemyTypes.forEach(enemy => {
      switch (enemy.texture) {
        case 'bee':
          enemies.push(new BeeSprite(scene, enemy.x, enemy.y))
          break
        case 'slime':
          enemies.push(new SlimeSprite(scene, enemy.x, enemy.y))
          break
      }
    })
    this.addMultiple(enemies)
  }

  update() {
    // check if the enemy should change its direction
    // @ts-ignore
    this.children.iterate((enemy: BeeSprite | SlimeSprite) => {
      if (enemy.dead) return

      let enemyIsMovingRight = enemy.body.velocity.x >= 0

      let hasGroundDetection = this.tiles.filter(tile => {
        let enemyPositionX = enemyIsMovingRight ? enemy.body.right : enemy.body.left
        let x = enemyPositionX + 32 > tile.x && enemyPositionX - 32 < tile.x + this.TILE_SIZE
        let y =
          enemy.body.bottom + this.TILE_SIZE / 2 > tile.y &&
          enemy.body.bottom + this.TILE_SIZE / 2 < tile.y + this.TILE_SIZE
        return x && y
      })

      if (hasGroundDetection.length === 0) {
        //@ts-ignore
        enemy.body.setVelocityX(enemy.body.velocity.x * -1)
        enemy.setFlipX(!enemyIsMovingRight)
      }
    }, null)
  }
}

The bee (src/scripts/components/enemies/bee.ts)

Frames 0 and 1 represent the usual movement, while frame number 2 is used when the bee is dead:

Bee enemy (assets/img/bee.png)
Dead bee (assets/audio/bee.mp3)
import EnemyClass from './enemyClass'

export default class BeeSprite extends EnemyClass {

  constructor(scene: Phaser.Scene, x: number, y: number) {
    super(scene, x, y, 'bee')
    scene.add.existing(this)
    scene.physics.add.existing(this)

    scene.anims.create({
      key: 'fly',
      frames: scene.anims.generateFrameNumbers('bee', { start: 0, end: 1 }),
      frameRate: 8,
      repeat: -1
    })
    this.play('fly')

    //@ts-ignore
    this.body.setVelocityX(-120)
    this.setOrigin(0.5, 1)
    this.body.setSize(80, 135)
    this.body.setOffset((this.width - 80) / 2, 30)

    this.audio = scene.sound.add('bee', { volume: 1.0 })
  }

  update() { }

  kill() {
    if (this.dead) return

    this.body.setSize(80, 40)

    this.removeEnemy(2) // Frame number 2 is used when the bee is dead
  }
}

The slime (src/scripts/components/enemies/slime.ts)

Frames from 0 to 4 represent the usual movement, while frame number 5 is used when the slime is dead:

Slime enemy (assets/img/slime.png)
Dead slime (assets/audio/slime.mp3)
import EnemyClass from './enemyClass'

export default class SlimeSprite extends EnemyClass {

  constructor(scene: Phaser.Scene, x: number, y: number) {
    super(scene, x, y, 'slime')
    scene.add.existing(this)
    scene.physics.add.existing(this)

    scene.anims.create({
      key: 'crawl',
      frames: scene.anims.generateFrameNumbers('slime', { start: 0, end: 4 }),
      frameRate: 6,
      yoyo: true,
      repeat: -1
    })
    this.play('crawl')

    //@ts-ignore
    this.body.setVelocityX(-60)
    this.setOrigin(0.5, 1)
    this.setScale(1)
    this.body.setSize(this.width - 40, this.height - 20)
    this.body.setOffset(20, 20)

    this.audio = scene.sound.add('slime', { volume: 1.0 })
  }

  update() { }

  kill() {
    if (this.dead) return

    this.removeEnemy(5) // Frame number 5 is used when the bee is dead
  }
}

Killing the enemies (src/scripts/scenes/mainScene.ts)

The player kills an enemy when it jumps over it. As a reward, it will get 5 points:

... 
   this.physics.add.overlap(this.player, this.enemiesGroup, (player: Player, enemy: EnemySprite) => {
      if (enemy.dead) return
      if (enemy.body.touching.up && player.body.touching.down) {
        this.score += 5
        scoreText.update(this.score, this.keys)
        player.killEnemy()
        enemy.kill()
      } else {
        player.kill()
      }
    })
...

Objects (src/scripts/components/objects/objectsGroup.ts)

All the tiles in the map are read and the objects are created depending on the texture field:

import CoinSprite from './coin'
import KeySprite from './key'

export default class ObjectsGroup extends Phaser.GameObjects.Group {
  constructor(scene: Phaser.Scene, tilesConfig: TilesConfig[]) {
    super(scene)

    let objectTypes = tilesConfig.filter(tile => tile.type === 'object')

    let objects: Array<CoinSprite | KeySprite> = []
    objectTypes.forEach(object => {
      switch (object.texture) {
        case 'coin':
          objects.push(new CoinSprite(scene, object.x, object.y))
          break
        case 'key':
          objects.push(new KeySprite(scene, object.x, object.y))
          break
      }
    })

    this.addMultiple(objects)
  }
}

The coin (src/scripts/components/objects/coin.ts)

All the frames are selected to create the animation:

The coin (assets/img/coin.png)
Collecting coin (assets/audio/coin.mp3)
import ObjectClass from "../objects/objectClass";

export default class CoinSprite extends ObjectClass {

  constructor(scene: Phaser.Scene, x: number, y: number) {
    super(scene, x, y, 'coin')
    scene.add.existing(this)
    scene.physics.add.existing(this)

    this.setImmovable()
    this.setScale(1.5)
    // @ts-ignore
    this.body.setAllowGravity(false)

    scene.anims.create({
      key: 'spincoin',
      frames: scene.anims.generateFrameNames('coin'),
      frameRate: 16,
      repeat: -1
    })
    this.play('spincoin')

    this.audio = scene.sound.add('coin', { volume: 1.0 })
  }
}

The key (src/scripts/components/objects/key.ts)

All the frames are selected to create the animation:

The key (assets/img/key.png)
Collecting key (assets/audio/key.mp3)
import ObjectClass from "./objectClass";

export default class CoinSprite extends ObjectClass {

  constructor(scene: Phaser.Scene, x: number, y: number) {
    super(scene, x, y, 'key')
    scene.add.existing(this)
    scene.physics.add.existing(this)

    this.setImmovable()
    this.setScale(0.7)
    // @ts-ignore
    this.body.setAllowGravity(false)

    scene.anims.create({
      key: 'spinkey',
      frames: scene.anims.generateFrameNames('key'),
      frameRate: 10,
      repeat: -1
    })
    this.play('spinkey')

    this.audio = scene.sound.add('key', { volume: 1.0 })
  }
}

Collecting objects (src/scripts/scenes/mainScene.ts)

The counters of coins and keys are incremented when any of these objects is collected:

...
    this.physics.add.overlap(this.player, objectsGroup, (player: Player, object: ObjectClass) => {
      if (object.collecting) return
      if (object instanceof CoinSprite) this.score++
      else if (object instanceof KeySprite) this.keys++
      scoreText.update(this.score, this.keys)
      object.collect()
    })
...

The player (src/scripts/components/player/player.ts)

The get a more realistic movement, the player is animated using the “spine” plugin. The full documentation about this plugin can be found here, and some examples can be found here.

Player animation using spine plugin (assets/spine/boy.png)
Player killed (assets/audio/hurt.mp3)
import Controls from '../controls/controls'
import PlayerSpine from './playerSpine'

export default class Player extends Phaser.Physics.Arcade.Sprite {
  private _dead: boolean = false
  private _halt: boolean = false
  private mapSize: MapSize
  playerSpine: PlayerSpine
  audioHurt: any

  constructor(scene: Phaser.Scene, player: TilesConfig, mapSize: MapSize, level: number) {
    super(scene, player.x, player.y, player.texture)
    scene.add.existing(this)
    scene.physics.add.existing(this)

    this.scene = scene
    this.mapSize = mapSize

    this.setVisible(false)

    this.setOrigin(0, 1)
    this.setDragX(1500)
    this.body.setSize(70, 132)
    this.body.setOffset(25, 24)

    let theSkin = level % 2 == 0 ? 'blue' : 'green'
    this.playerSpine = new PlayerSpine(scene, this.body.center.x, this.body.bottom)
    this.playerSpine.setSkin(theSkin)

    this.audioHurt = scene.sound.add('hurt', { volume: 1.0 })
  }

  kill() {
    this._dead = true

    this.audioHurt.play()

    // animate the camera if the player dies
    this.scene.cameras.main.shake(500, 0.025)
    this.scene.time.addEvent({
      delay: 500,
      callback: () => this.scene.scene.restart()
    })
  }

  killEnemy() {
    this.playerSpine.spine.customParams.isKilling = true
    this.setVelocityY(-600)
  }

  halt() {
    this.body.enable = false
    this._halt = true
  }

  update(cursors: any, controls: Controls) {
    if (this._halt || this._dead) return

    // check if out of camera and kill
    if (this.body.right < this.mapSize.x || this.body.left > this.mapSize.width || this.body.top > this.mapSize.height)
      this.kill()

    // controls left & right
    if (cursors.left.isDown || controls.leftIsDown) {
      this.setVelocityX(-500)
      this.playerSpine.spine.setScale(-1, 1)
    } else if (cursors.right.isDown || controls.rightIsDown) {
      this.setVelocityX(550)
      this.playerSpine.spine.setScale(1, 1)
    }
    // controls up
    if ((cursors.up.isDown || cursors.space.isDown || controls.upIsDown) && this.body.blocked.down) {
      this.setVelocityY(-1250)
    }

    // update spine animation
    this.playerSpine.update(this)
  }
}

The goal (src/scripts/components/goal/goalSprite.ts)

When the user collides with the door, an achievement sound will be played, and it will jump to the next level.

The goal (assets/img/goal.png)
Next level (assets/audio/door.mp3)
export default class GoalSprite extends Phaser.Physics.Arcade.Sprite {
  private _loadNextLevel: boolean = false;
  private audio: any;

  constructor(scene: Phaser.Scene, tilesConfig: TilesConfig) {
    super(scene, tilesConfig.x, tilesConfig.y + 14, 'goal')
    scene.add.existing(this)
    scene.physics.add.existing(this)

    this.setImmovable(true)
    // @ts-ignore
    this.body.setAllowGravity(false)
    this.setOrigin(0, 0.5)

    this.audio = scene.sound.add('door', { volume: 1.0 })
  }

  get loadNextLevel() {
    return this._loadNextLevel
  }

  nextLevel(scene: Phaser.Scene, level: number, score: number, keys: number) {
    if (this._loadNextLevel) return
    this._loadNextLevel = true

    this.audio.play()

    scene.cameras.main.fadeOut()
    scene.time.addEvent({
      delay: 2000,
      callback: () => {
        scene.scene.restart({ level: level += 1, score: score, keys: keys })
      }
    })
  }
}

Jumping to the next level (src/scripts/scenes/mainScene.ts)

After colliding with the door, the user will only jump to the next level in case it collected previously at least one key:

...
    this.physics.add.overlap(this.player, this.goal, (player: Player, goal: GoalSprite) => {
      if (!this.keys) return
      player.halt()
      this.keys--
      goal.nextLevel(this, this.level, this.score, this.keys)
    })
...

Progressive Web App (PWA)

This game is 100% PWA ready, so that it can be installed and executed in your mobile device as it was an app from the Play Store. You can easily personalize its settings by following these steps:

  • Replace both icons in /pwa/icons with your own.
    • One is 512×512 the other 192×192.
  • Add your own favicon.ico to /src.
  • Adjust these parameters in the manifest.json file in /pwa:
    • short_name: Max. 12 characters.
    • name: The full game name.
    • orientation: “landscape” or “portrait”.
    • background_color: color of the splash screen.
    • theme_color: color of the navbar – has to match the theme-color in the index.html file.
  • You can leave the sw.js (serviceWorker) file in /pwa as it is.
  • Change the gameName in /webpack/webpack.common.js

Read more about PWA on developers.google.com.

Running the game

You can get the game up and running just following these steps:

  1. Install nodejs (in case you do not have installed it yet). Select the version recommended for most users and just click next on each option to use the default settings.
  2. Download the code. You can download from this link a single zip file containing the full game template and all the assets.
  3. Uncompress the zip file, and open a terminal from inside the project folder.
  4. Execute “npm install” to install all the dependencies requested by the project.
  5. Execute “npm run start” to compile and execute the code. After this command is completed, a new tab will be opened in your default browser. The game will also be refreshed automatically when the source code changes.
  6. Execute “npm run build” to get a production version. After executing this command, all the html, css and js files, and also all the assets required to run the game will be put inside the “dist” folder, ready to be uploaded to any public web server. For example, you could make your game available to anyone just by creating a new project in https://replit.com and uploading all the files inside “dist” to the root folder of the replit project.

Play the game on your browser

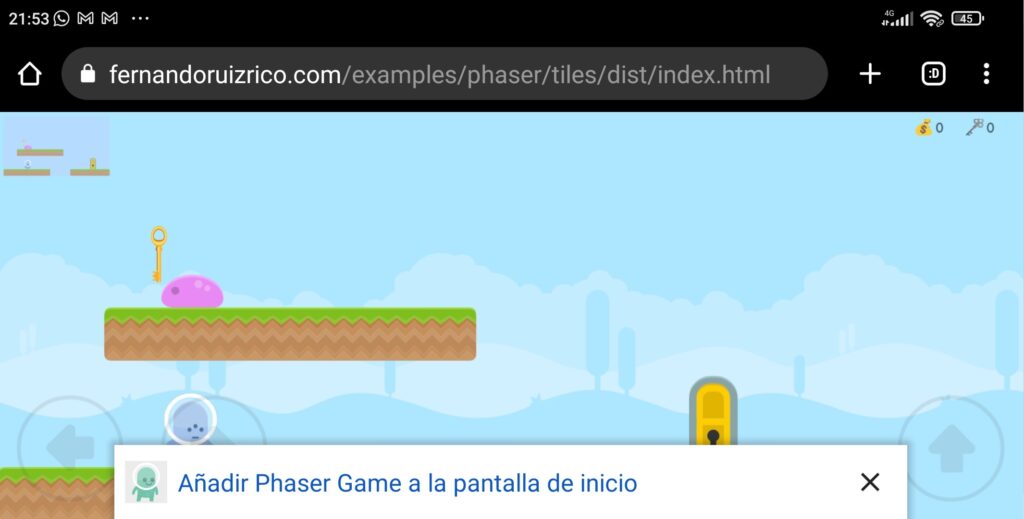
You have also a version ready to be played online here.

Install the game in your phone

Since all the PWA functionality is included in this project, you can install your application in any mobile device (Chrome browser and Android operating system are the preferred options for this purpose). You will get the same behaviour as the apps in the play store: an icon will be created after carrying out the installation from your browser, a loading screen will be shown when the game is started, and the game will run in fullscreen and landscape mode.

When you open the address of the game in your browser, a message to install the application is displayed after a few seconds:

Installing the app

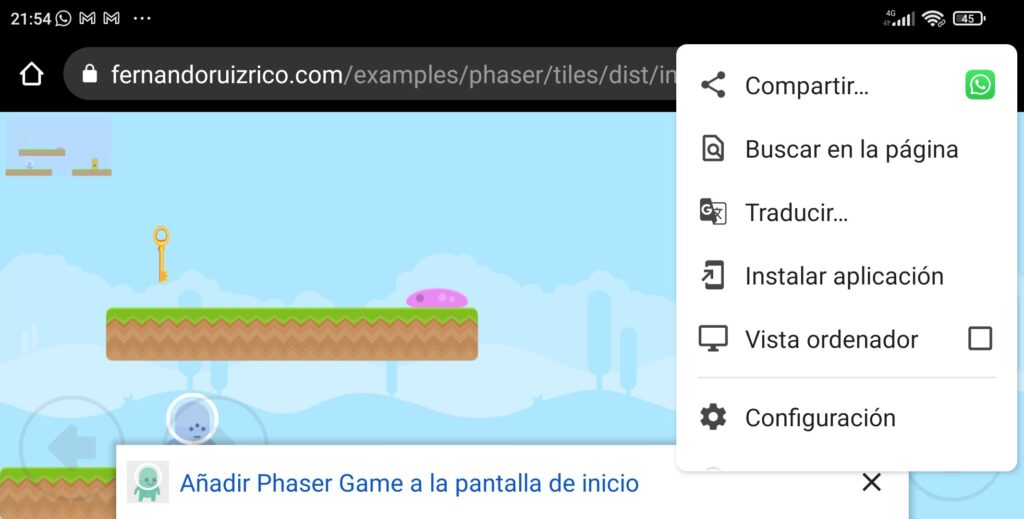
Or you can also install the game manually just by selecting the option “Instalar aplicación” from the browser menu:

Installing the app

Bibliography

More information about the template used to build this game can be found on github.