Introduction
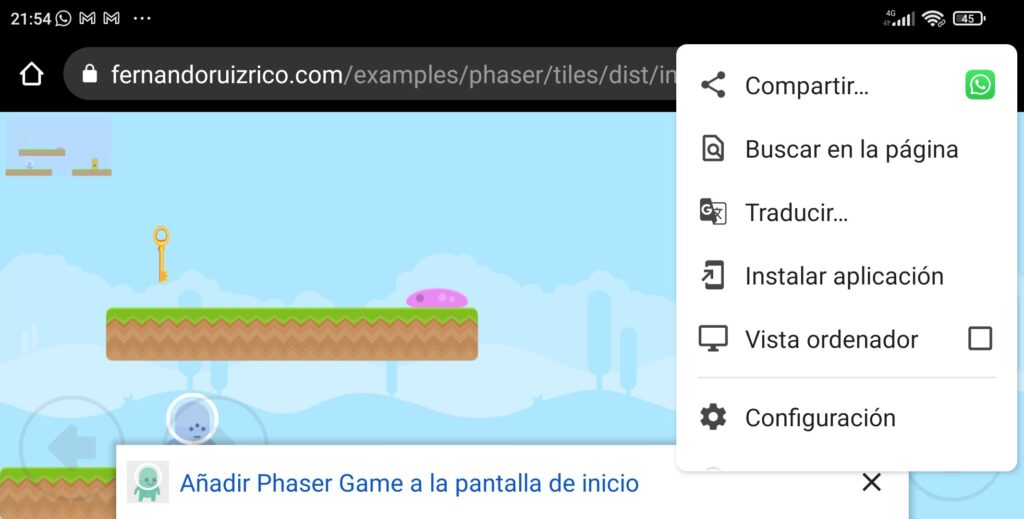
In the previous unit, we developed a clone of Google Chrome’s “secret” Dino game using simple web technologies such as HTML, CSS, JavaScript, and Phaser 3. This game can be run on any device using any browser (not only Chrome). The result is a game that closely resembles the original with less than 10% of the code lines.
Now we will add some improvements to the original game:
- Adding colors:
- Blue sky: The game will feature a blue sky background to create a more visually appealing and natural environment.
- Brown ground: The ground will be colored brown to simulate a desert-like terrain, enhancing the thematic consistency of the game.
- Using the whole screen:
- Sky at the top: The sky background will extend from the top of the screen, providing a continuous and immersive visual experience.
- Ground at the bottom: The ground will stretch to the bottom of the screen, ensuring that the game environment fully occupies the available screen space.
- Adding more items:
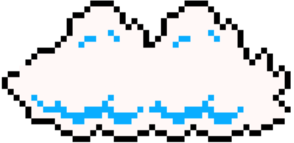
- Additional clouds: More clouds will be introduced to the game, floating at different heights to add depth and variety to the sky.
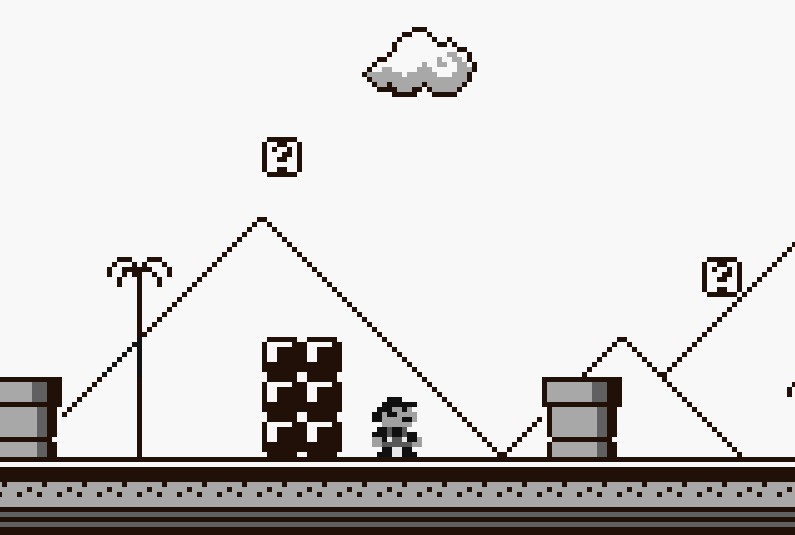
- Mountains: Mountains will be added in the background, enhancing the scenery and creating a more dynamic landscape.
- Nests with eggs: Nests containing eggs will be placed throughout the game, serving as potential collectibles or decorative elements to enrich gameplay.
- Varying speeds based on distance:
- Parallax effect: Items such as clouds, mountains, obstacles, and eggs will move at different speeds relative to their distance from the player. This creates a parallax effect, making closer items appear to move faster than those further away, adding depth and a sense of realism to the game.
CSS code (styles.css)
No changes are needed for the CSS code, so it will remain as before:
html, body {
  margin: 0px;
  padding: 0px;
  overflow: hidden;
}
HTML code (index.html)
No changes are needed for the HTML code, so it will also remain as before:
<!DOCTYPE html>
<html lang="en">

<head>
  <meta charset="utf-8">
  <meta name="description" content="Dino game clone using Phaser">
  <meta name="keywords" content="HTML, CSS, JavaScript, Phaser">
  <meta name="author" content="Fernando Ruiz Rico">

  <title>Dino Phaser</title>

  <link href="styles.css" rel="stylesheet">
</head>

<body>
  <script src="https://cdn.jsdelivr.net/npm/[email protected]/dist/phaser.min.js"></script>
  <script src="preload.js"></script>
  <script src="create.js"></script>
  <script src="update.js"></script>
  <script src="config.js"></script>
</body>

</html>
Improving text styling (config.js)
To improve the visual quality of the text in the Dino game clone, we will reduce pixelation by decreasing the text resolution, resulting in smoother and clearer text edges. Additionally, we will add a white shadow effect with slight offsets and blur, enhancing the contrast and readability. This combination ensures that the text stands out against varying backgrounds, making it easier for players to read scores and instructions quickly and accurately, thus providing a more polished and professional look to the game.
Changes
We will update the TEXT_STYLE configuration to enhance readability and visual appeal by using a bold font, reducing pixelation, and adding a white shadow to improve contrast and visibility:
const TEXT_STYLE = {
  fill: "#535353", font: '900 35px Courier', resolution: 2,
  shadow: { offsetX: 2, offsetY: 2, blur: 2, color: '#FFFFFF', fill: true }
};
- Resolution Adjustment: The text resolution is decreased from 10 to 2. This will make the text appear with a lower level of pixelation.
- Text Shadow Addition:
- White Color: The shadow is white (
#FFFFFF), which helps it stand out against various backgrounds. - Offset: The shadow is slightly offset by 2 pixels to the right (
offsetX: 2) and 2 pixels down (offsetY: 2), creating a subtle but effective drop shadow. - Blur Radius: A small blur radius of 2 pixels (
blur: 2) is applied to soften the shadow edges, enhancing the text’s readability. - Fully Filled: The shadow effect is fully filled (
fill: true), ensuring that the shadow covers the entire text uniformly, thereby improving the overall visual quality and making the text easier to read.
- White Color: The shadow is white (
File contents
// Fill the whole width and height of the screen
const WIDTH = window.innerWidth;
const HEIGHT = window.innerHeight;

// Time in milliseconds for each obsticle (lower = faster)
const OBSTICLE_TIME = 750;

// Text style to be used when printing texts (scores, etc.)
const TEXT_STYLE = {
  fill: "#535353", font: '900 35px Courier', resolution: 2,
  shadow: { offsetX: 2, offsetY: 2, blur: 2, color: '#FFFFFF', fill: true }
};

// Variables to be initialized each time the game is restarted
function initVariables() {
  this.isGameRunning = false;
  this.gameSpeed = 10;
  this.respawnTime = 0;
  this.score = 0;
}

// Phaser initialization
let game = new Phaser.Game({
  type: Phaser.AUTO,
  width: WIDTH,
  height: HEIGHT,
  pixelArt: true,
  transparent: true,
  physics: {
    default: 'arcade',
    arcade: {
      debug: false
    }
  },
  scene: { preload: preload, create: create, update: update }
});

// Reload the game when the device orientation changes or the user resizes the window
let resizing = false;
window.addEventListener('resize', () => {
  if (resizing) clearTimeout(resizing);
  resizing = setTimeout(() => window.location.reload(), 500);
});
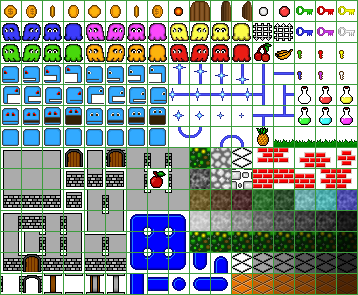
The new assets
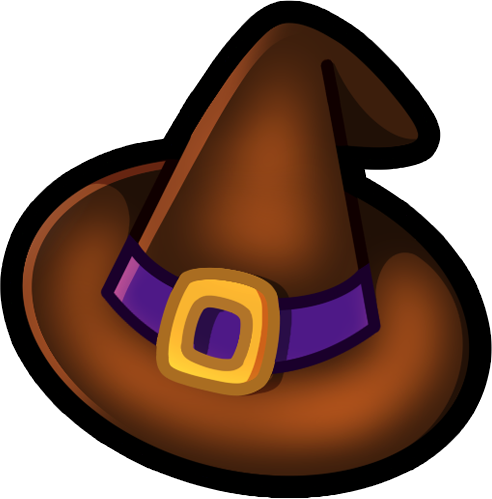
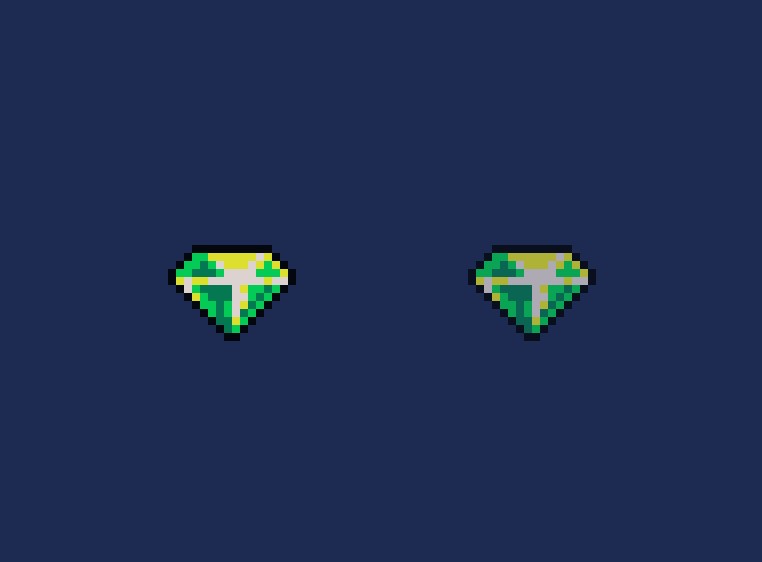
We will add mountains in the background and some eggs in the foreground. You can find both images below, and you can also download a zip file containing all the assets here.


Loading the new assets (preload.js)
By adding mountains and eggs, the game gains additional scenery elements, making the game environment more detailed and engaging. To achieve this, only a couple of changes are required inside the “preload.js” file since we are adding only two new images (mountains and eggs).
Changes
The following lines will incorporate the mountain and eggs images into the game’s assets:
function preload() {
    ...
    this.load.image('mountain', 'assets/mountain.png');
    this.load.image('eggs', 'assets/eggs.png');
    ...
}
- By loading the mountain image, the game can render mountains at various positions and scales to enhance the visual aesthetics.
- By loading the eggs image, the game can place eggs at various locations, adding an additional layer of interactivity or visual interest.
File contents
// Load all the audios, images and sprites
function preload() {
  this.load.audio('jump', 'assets/jump.m4a');
  this.load.audio('hit', 'assets/hit.m4a');
  this.load.audio('reach', 'assets/reach.m4a');

  this.load.image('ground', 'assets/ground.png');
  this.load.image('mountain', 'assets/mountain.png');
  this.load.image('cloud', 'assets/cloud.png');
  this.load.image('eggs', 'assets/eggs.png');
  this.load.image('dino-idle', 'assets/dino-idle.png');
  this.load.image('dino-hurt', 'assets/dino-hurt.png');
  this.load.image('restart', 'assets/restart.png');
  this.load.image('game-over', 'assets/game-over.png');

  this.load.image('obsticle-1', 'assets/cactuses_small_1.png');
  this.load.image('obsticle-2', 'assets/cactuses_small_2.png');
  this.load.image('obsticle-3', 'assets/cactuses_small_3.png');
  this.load.image('obsticle-4', 'assets/cactuses_big_1.png');
  this.load.image('obsticle-5', 'assets/cactuses_big_2.png');
  this.load.image('obsticle-6', 'assets/cactuses_big_3.png');

  this.load.spritesheet('dino', 'assets/dino-run.png', { frameWidth: 88, frameHeight: 94 });
  this.load.spritesheet('enemy-bird', 'assets/enemy-bird.png', { frameWidth: 92, frameHeight: 77 });
}

// Set the volume of each audio
function initSounds() {
  this.jumpSound = this.sound.add('jump', { volume: 0.75 });
  this.hitSound = this.sound.add('hit', { volume: 0.75 });
  this.reachSound = this.sound.add('reach', { volume: 0.75 });
}

// Define all the animations from the previously loaded spritesheets
function createAnims() {
  this.anims.create({
    key: 'dino-waiting',
    frames: this.anims.generateFrameNumbers('dino', { start: 0, end: 1 }),
    frameRate: 1,
    repeat: -1
  })

  this.anims.create({
    key: 'dino-run',
    frames: this.anims.generateFrameNumbers('dino', { start: 2, end: 3 }),
    frameRate: 10,
    repeat: -1
  })

  this.anims.create({
    key: 'enemy-bird-anim',
    frames: this.anims.generateFrameNumbers('enemy-bird', { start: 0, end: 1 }),
    frameRate: 6,
    repeat: -1
  })
}
Adding sky and ground colors, and some mountains (create.js)
The new version of the game includes adding colors to the sky and the ground, enhancing the overall visual appeal and creating a more immersive environment. We will also introduce a new function to add mountains to the game, calling it from the main create function immediately after creating the clouds to ensure the mountains appear in a higher layer.
Changes
The createWorld function will add color to the sky and ground by specifying color codes as parameters when creating the rectangles:
function createWorld() {
  this.sky = this.add.rectangle(0, 0, WIDTH, HEIGHT, 0x87CEEB).setOrigin(0, 0);
  this.belowGround = this.add.rectangle(0, HEIGHT / 1.5, WIDTH, HEIGHT / 3, 0xD2B48C).setOrigin(0, 0);
  ...
}
The sky will be a blue rectangle (0x87CEEB) spanning the entire screen, positioned at the top (setOrigin(0, 0)), while the ground will be made of a brown rectangle (0xD2B48C) occupying the lower third of the screen, starting at half the screen’s height.
The next step involves displaying the mountains by introducing the createMountains function and integrating it into the main create function. These mountains will serve as background elements to enhance the visual appeal and depth of the game environment. The function will position the mountains randomly along the x-axis and consistently along the y-axis, while also scaling them variably, contributing to a dynamic and immersive gaming experience:
function createMountains() {
  this.mountains = this.add.group();
  for (let i = 0; i < 3; i++) {
    const x = Phaser.Math.Between(0, WIDTH);
    const y = HEIGHT / 1.5;
    const scale = Phaser.Math.FloatBetween(1.0, 4.0);
    this.mountains.add(this.add.image(x, y, 'mountain').setScale(scale).setOrigin(0, 1));
  }
}
- Group creation: The function begins by creating a new group to hold all the mountain images. This allows for easier management and manipulation of the mountains as a single entity.
- Mountain positioning and scaling:
- Random
xposition: Each mountain is positioned at a random location along the x-axis (Phaser.Math.Between(0, WIDTH)), which ensures that the mountains are spread across the screen. - Fixed
yposition: All mountains are placed at a fixed y-coordinate (HEIGHT / 1.5), which situates them in the lower half of the screen, simulating a horizon. - Random scaling: Each mountain is assigned a random scale (
Phaser.Math.FloatBetween(1.0, 4.0)), adding visual diversity and depth to the scene. Larger mountains appear closer to the player, while smaller ones seem further away.
- Random
- Image Addition: The mountains are added to the group with their respective positions and scales, and their origin is set to the bottom-left corner (
setOrigin(0, 1)), ensuring they appear grounded at the correct height.
The last change inside the create.js file will consist of integrating createMountains into the main create function:
function create() {
  ...
  createWorld.call(this);
  createClouds.call(this);
  createMountains.call(this);
  ...
}
The order of the functions calls (createWorld, createClouds, and createMountains) is crucial for maintaining a coherent and visually appealing game environment. Each step builds upon the previous one, ensuring that all elements are correctly layered and contribute to a dynamic and immersive game world. By establishing the foundation first, enhancing the background second, and adding depth third, the game achieves a realistic and engaging visual structure that enhances the player’s experience:
- createWorld: Sets up the basic game world, including the sky, ground, and obstacle framework. This is the first step because it establishes the fundamental structure of the game. The sky and ground serve as the canvas upon which all other game elements are placed. Without this setup, there would be no context for the other elements to exist within.
- createClouds: Adds clouds to the sky. Adding clouds after the basic world setup ensures that they are correctly layered above the sky but below the ground and obstacles. This layering is essential for maintaining the visual hierarchy and realism in the game. Clouds enhance the background without interfering with the main gameplay elements.
- createMountains: This new function call integrates the mountains into the game, adding visual depth and enhancing the background scenery. Integrating mountains after the clouds ensures that they are correctly layered. Mountains should appear behind the ground but in front of the sky and clouds. This order maintains the natural layering one would expect in a real-world scene. Mountains add depth to the environment, making the game world feel more expansive and visually rich.
File contents
// Score text on the right side of the screen
function createScore() {
  this.scoreText = this.add.text(WIDTH - 25, 25, "", TEXT_STYLE).setOrigin(1, 0);
  this.highScoreText = this.add.text(0, 25, "", TEXT_STYLE).setOrigin(1, 0).setAlpha(0.75);
}

// Five clouds at random positions
function createClouds() {
  this.clouds = this.add.group();
  for (let i = 0; i < 5; i++) {
    const x = Phaser.Math.Between(0, WIDTH);
    const y = Phaser.Math.Between(0, HEIGHT / 2);
    const scale = Phaser.Math.FloatBetween(1.0, 3.0);
    this.clouds.add(this.add.image(x, y, 'cloud').setScale(scale).setOrigin(0, 0));
  }
}

// Three mountains at random X positions
function createMountains() {
  this.mountains = this.add.group();
  for (let i = 0; i < 3; i++) {
    const x = Phaser.Math.Between(0, WIDTH);
    const y = HEIGHT / 1.5;
    const scale = Phaser.Math.FloatBetween(1.0, 4.0);
    this.mountains.add(this.add.image(x, y, 'mountain').setScale(scale).setOrigin(0, 1));
  }
}

// Dino starts running and the the ground is created
function createGround() {
  this.startText.destroy();
  this.dino.setVelocityX(100);
  this.dino.play('dino-run', 1);

  const interval = setInterval(() => {
    this.ground.width += (WIDTH / 100);
    if (this.ground.width >= WIDTH) {
      clearInterval(interval);
      this.dino.setVelocityX(0);
      this.scoreText.setAlpha(1);
      this.isGameRunning = true;
    }
  }, 50);
}

// Dino waiting animation, keyboard initilization and starting text
function createDino() {
  this.dino = this.physics.add.sprite(0, HEIGHT / 1.5 - 16, 'dino-idle');
  this.dino.setSize(50, 75).setGravityY(5000).setOrigin(0, 1);
  this.dino.play('dino-waiting', true);

  this.physics.add.collider(this.dino, this.belowGround);
  this.physics.add.collider(this.dino, this.obsticles, () => stopGame.call(this));

  this.cursors = this.input.keyboard.createCursorKeys();
  this.spaceBar = this.input.keyboard.addKey(Phaser.Input.Keyboard.KeyCodes.SPACE);

  this.startText = this.add.text(WIDTH - 15, HEIGHT / 1.5, "Press to play", TEXT_STYLE).setOrigin(1);
}

// Game over screen and pause until player starts the game again
function createGameOverScreen() {
  this.gameOverShadow = this.add.image(2, 2, 'game-over').setTintFill(0xFFFFFF);
  this.gameOverText = this.add.image(0, 0, 'game-over');

  this.restart = this.add.image(0, 50, 'restart').setInteractive();
  this.gameOverScreen = this.add.container(WIDTH / 2, HEIGHT / 2 - 50);
  this.gameOverScreen.add([this.gameOverShadow, this.gameOverText, this.restart]);

  this.input.keyboard.on('keydown_ENTER', () => startGame.call(this));
  this.restart.on('pointerdown', () => startGame.call(this));
}

// Define the physical ground and obsticles group
function createWorld() {
  this.sky = this.add.rectangle(0, 0, WIDTH, HEIGHT, 0x87CEEB).setOrigin(0, 0);
  this.belowGround = this.add.rectangle(0, HEIGHT / 1.5, WIDTH, HEIGHT / 3, 0xD2B48C).setOrigin(0, 0);
  this.ground = this.add.tileSprite(0, HEIGHT / 1.5, 88, 16, 'ground').setOrigin(0, 0);
  this.physics.add.existing(this.belowGround);
  this.belowGround.body.setImmovable();
  this.obsticles = this.physics.add.group();
  this.eggs = this.physics.add.group();
}

// Create all the elements in the game and initilize the score
function create() {
  initVariables.call(this);
  initSounds.call(this);
  createAnims.call(this);
  createWorld.call(this);
  createClouds.call(this);
  createMountains.call(this);
  createScore.call(this);
  createDino.call(this);

  setInterval(() => updateScore.call(this), 100);
}
Adding the eggs and moving all the items (update.js)
The update.js file has been expanded to include new game mechanics such as handling eggs and dynamically moving items across the screen at different speeds.
Changes
We will use a new function placeEgg that will randomly position eggs on the screen:
function placeEgg() {
  const x = Phaser.Math.Between(WIDTH, WIDTH * 2);
  const y = Phaser.Math.Between(HEIGHT / 1.5 + 50, HEIGHT);
  const scale = (y / HEIGHT) * 1.5; // The closer to the bottom of the screen, the bigger the egg
  this.eggs.add(this.add.image(x, y, 'eggs').setScale(scale).setOrigin(0, 1));
}
xis set to a random position between the current screen width and twice the width, ensuring eggs appear off-screen to the right initially.yis a random position between just below the ground level and the bottom of the screen.- The
scaleof the egg depends on itsyposition: eggs closer to the bottom are scaled larger. - Adds the egg image to the
eggsgroup with the specified scale and origin, in order to move all the eggs at the same time when the game is running.
Because we will have more items on the screen to be moved, we will use a new function moveItems to handle the movement of each group of items (like clouds, obstacles, or eggs) across the screen:
function moveItems(items, speed, destroy) {
  items.getChildren().forEach(item => {
    item.x -= speed;
    if (item.getBounds().right < 0) {
      if (destroy) item.destroy();
      else item.x = WIDTH;
    }
  });
}
items.getChildren().forEach(item => {...})iterates through each item in the group.- Each item’s
xposition is decremented byspeed, making it move to the left. - If an item moves off-screen (its right boundary is less than 0), it either gets destroyed (if
destroyis true) or is repositioned to the right edge of the screen (ifdestroyis false).
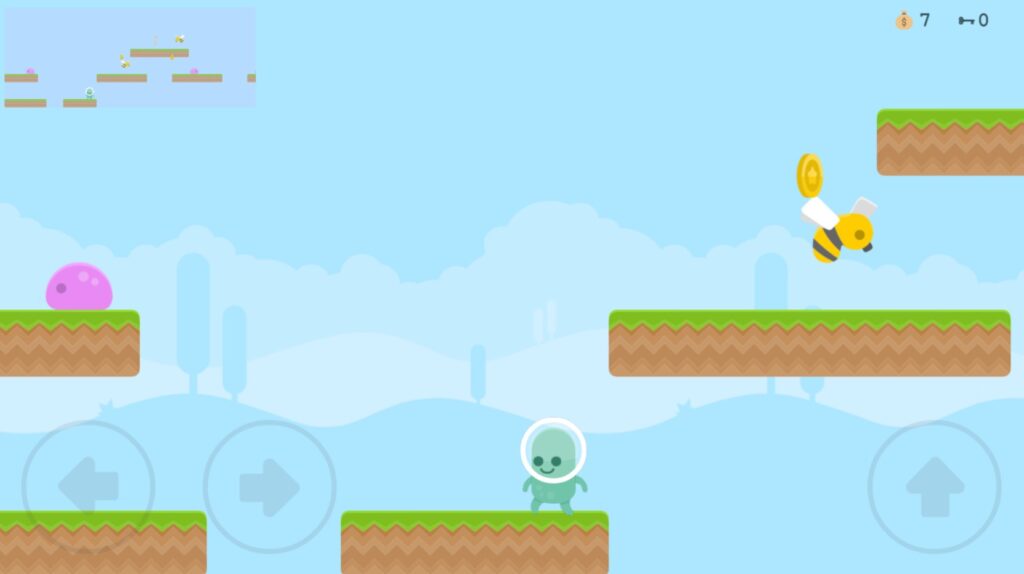
The update function is responsible for continuously updating the screen while the game is running. It displays the eggs at the same time obstacles appear and moves all items (clouds, mountains, obstacles, and eggs) at different speeds to create a sense of depth. This makes items appear closer or farther away from the player, enhancing the gameplay experience:
- Displaying Eggs and Obstacles: This function will control the timing of when eggs and obstacles appear on the screen. Both will be placed at intervals to create challenges for the player.
- Moving Items at Different Speeds: The function will move different items (clouds, mountains, obstacles, and eggs) across the screen at varying speeds. This will create a parallax effect, making items appear closer or farther away from the player based on their speed. For instance, clouds might move slowly to appear in the distance, while obstacles and eggs will move faster to simulate being on the ground.
function update() {
    if (this.respawnTime >= OBSTICLE_TIME) {
      ...
      placeEgg.call(this);
    }

    moveItems(this.clouds, this.gameSpeed / 20, false);
    moveItems(this.mountains, this.gameSpeed / 10, false);
    moveItems(this.obsticles, this.gameSpeed, true);
    moveItems(this.eggs, this.gameSpeed, true);
    ...
}
The code above will create a sense of depth and immersion by simply adjusting the speeds at which different items move:
- The
respawnTimevariable determines when new obstacles and eggs are placed on the screen. WhenrespawnTimereaches a certain threshold (e.g., 750), the function callsplaceObsticleandplaceEggto add new items to the game. - Moving Items:
- Clouds: Moved slowly (e.g.,
cloud.x -= 0.5) to give a distant background effect. - Mountains: Moved at a moderate speed to appear mid-distance.
- Obstacles and Eggs: Moved at the game speed (
this.gameSpeed) to appear on the ground and provide immediate challenges for the player.
- Clouds: Moved slowly (e.g.,
File contents
// Restart the game after dino is hurt
function startGame() {
  this.dino.setVelocityY(0);
  this.physics.resume();
  this.anims.resumeAll();
  this.obsticles.clear(true, true);
  this.gameOverScreen.destroy();
  this.isGameRunning = true;
}

// On game over a sound is played and all physics are paused
// The game over screen will be shown and mobile devices will vibrate
function stopGame() {
  initVariables.call(this);
  updateHighScore.call(this);
  this.hitSound.play();
  this.physics.pause();
  this.anims.pauseAll();
  this.dino.setTexture('dino-hurt');
  createGameOverScreen.call(this);
  if (window.navigator.vibrate) window.navigator.vibrate(50);
}

// Update the score and increase the game speed
function updateScore() {
  if (!this.isGameRunning) return;

  this.score++;
  this.gameSpeed += 0.01;

  if (this.score % 100 == 0) {
    this.reachSound.play();

    this.tweens.add({
      targets: this.scoreText,
      duration: 100,
      repeat: 3,
      alpha: 0,
      yoyo: true
    })
  }

  this.scoreText.setText(("0000" + this.score).slice(-5));
}

// Update the high score in case is higher than the previous one
function updateHighScore() {
  this.highScoreText.x = this.scoreText.x - this.scoreText.width - 30;

  const highScore = this.highScoreText.text.substr(this.highScoreText.text.length - 5);
  const newScore = Number(this.scoreText.text) > Number(highScore) ? this.scoreText.text : highScore;

  this.highScoreText.setText(`HI ${newScore}`);
}

// Place a new obsticle on the screen (either cactuses or birds)
function placeObsticle() {
  let obsticle;
  const obsticleNum = Phaser.Math.Between(1, 7);

  if (obsticleNum > 6) {
    obsticle = this.obsticles.create(WIDTH, HEIGHT / 1.5 - Phaser.Math.Between(20, 50), 'enemy-bird');
    obsticle.body.height /= 1.5
    obsticle.play('enemy-bird-anim', 1);
  } else {
    obsticle = this.obsticles.create(WIDTH, HEIGHT / 1.5 + 16, `obsticle-${obsticleNum}`)
  }

  obsticle.setOrigin(0, 1).setImmovable();
}

// Three eggs hidden at the beginning
function placeEgg() {
  const x = Phaser.Math.Between(WIDTH, WIDTH * 2);
  const y = Phaser.Math.Between(HEIGHT / 1.5 + 50, HEIGHT);
  const scale = (y / HEIGHT) * 1.5; // The closest to the bottom of the screen, the bigger the egg
  this.eggs.add(this.add.image(x, y, 'eggs').setScale(scale).setOrigin(0, 1));
}

// Move all the images on the screen belonging to a specific group of items
function moveItems(items, speed, destroy) {
  items.getChildren().forEach(item => {
    item.x -= speed;
    if (item.getBounds().right < 0) {
      if (destroy) item.destroy();
      else item.x = WIDTH;
    }
  })
}

// Update the screen (obsticles, ground, clouds and dino) and check the keyboard and mouse (or touch screen) continuously
// Dino will start running and jump if the user taps the screen or presses either the arrow up key or the spacebar
function update() {
  let jump = this.cursors.up.isDown || this.spaceBar.isDown || this.input.activePointer.isDown;

  if (this.isGameRunning) {
    this.ground.tilePositionX += this.gameSpeed;

    this.respawnTime += this.gameSpeed;
    if (this.respawnTime >= OBSTICLE_TIME) {
      this.respawnTime = 0;
      placeObsticle.call(this);
      placeEgg.call(this);
    }

    moveItems(this.clouds, this.gameSpeed / 20, false);
    moveItems(this.mountains, this.gameSpeed / 10, false);
    moveItems(this.obsticles, this.gameSpeed, true);
    moveItems(this.eggs, this.gameSpeed, true);

    if (this.dino.body.onFloor()) {
      if (jump) {
        this.jumpSound.play();
        this.dino.anims.stop();
        this.dino.setVelocityY(-1600);
        this.dino.setTexture('dino', 0);
      }
      else {
        this.dino.play('dino-run', true);
      }
    }
  }
  else if (jump && (this.ground.width < WIDTH)) {
    createGround.call(this);
  }
}
Proposed exercise: Using your own assets
Create your own improved version of the Dino game using your own assets (images, sprites and sounds). You can also change any other things you like.
Do not forget to create all the files required to run the code in this unit:
- styles.css
- index.html
- preload.js
- create.js
- update.js
- config.js
- assets folder
You may find many free assets in OpenGameArt, and some new versions of the Dino game in github:
Enjoy the game!
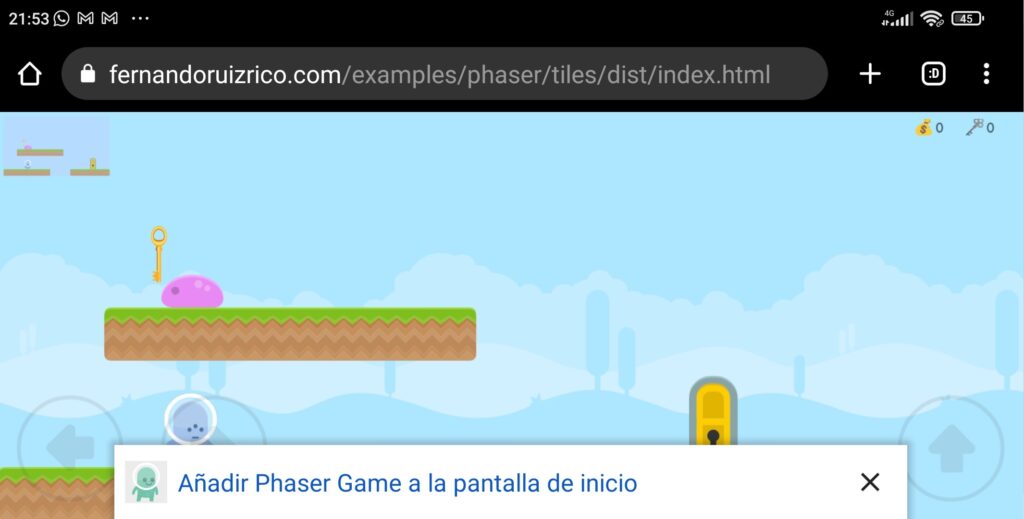
You can enjoy playing this wonderful game online here.