Phaser. Unit 12. Super Mario Bros recreation with random level generation

Introduction

Super Mario Phaser is a modern web-based recreation of the classic Super Mario Bros game, built using the Phaser framework. This project is designed to bring the beloved nostalgic experience of the original game to today’s web browsers, allowing players to enjoy it directly online.

One of the standout features of Super Mario Phaser is its random level generation. This means that every time you play, the levels are different, providing a fresh and challenging experience with each playthrough. This dynamic element ensures that the game remains exciting and unpredictable, offering new adventures and obstacles for players to overcome every time they start a new game.

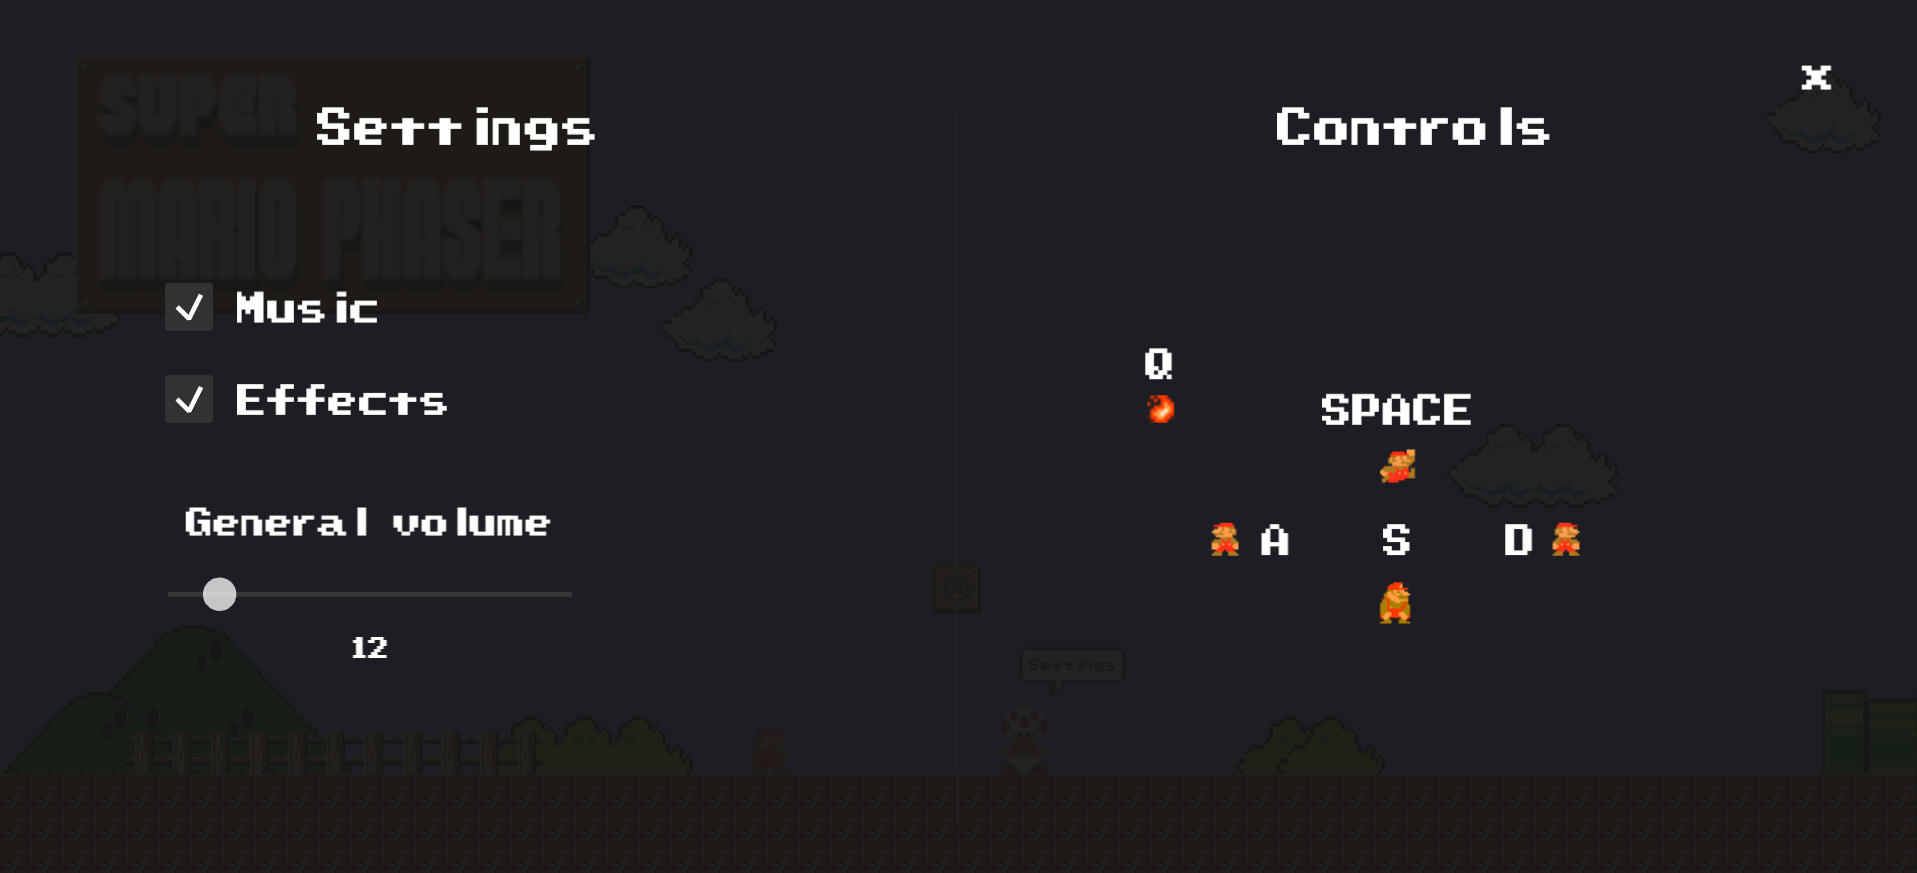
Additionally, we will provide options to customize the control keys, allowing players to configure their preferred inputs. We will also include settings to adjust or mute the sound, as well as control the volume of both music and sound effects, enhancing the overall gaming experience.

For more information about the original project, you can visit its GitHub repository.

Level generation

In this unit, we will create a simplified version of the original Super Mario Phaser project. Our goal is to enable easy customization of level generation, even for those without extensive programming knowledge.

To achieve this, we will use a matrix template where each cell specifies a type of block. By implementing a nested loop, we can efficiently render all the cells in the matrix, generating the level layout. This approach allows for straightforward modification and understanding of how different blocks are placed within the game environment.

For example, if we want to build a platform consisting of several blocks with some coins, we can use a matrix to define the layout. Each cell will represent a specific element (‘B’ stands for ‘block’ and ‘C’ stands for ‘coin’). Here is an example of how the matrix might look:

[' ', ' ', ' ', ' ', ' ', ' ', ' ', ' ', ' ', ' '],
[' ', ' ', ' ', ' ', ' ', ' ', ' ', ' ', ' ', ' '],
[' ', ' ', ' ', ' ', ' ', ' ', ' ', ' ', ' ', ' '],
[' ', ' ', ' ', ' ', ' ', ' ', ' ', ' ', ' ', ' '],
[' ', ' ', 'C', 'C', 'C', 'C', 'C', 'C', ' ', ' '],
[' ', ' ', 'B', 'B', 'B', 'B', 'B', 'B', ' ', ' '],
[' ', ' ', ' ', ' ', ' ', ' ', ' ', ' ', ' ', ' '],
[' ', ' ', ' ', ' ', ' ', ' ', ' ', ' ', ' ', ' '],
[' ', ' ', ' ', ' ', ' ', ' ', ' ', ' ', ' ', ' '],

In this matrix, we have a design where coins are positioned directly above a row of blocks. Specifically, the fifth row of the matrix places coins in the middle columns, while the sixth row directly beneath it contains a continuous platform of blocks. This layout allows for a straightforward and clear way to design and visualize the level structure. The empty spaces around the blocks and coins indicate that these elements are floating in the air, creating a typical platforming challenge for the player.

The assets

/assets/scenery/sign.png
/assets/others/loading.gif
/assets/entities/mario.png
/assets/entities/mario-grown.png
/assets/entities/mario-fire.png
/assets/scenery/overworld/cloud1.png
/assets/scenery/castle.png
/assets/scenery/overworld/bush1.png
/assets/scenery/overworld/fence.png
/assets/scenery/overworld/floor-bricks.png
/assets/scenery/underground/floor-bricks.png
/assets/entities/overworld/goomba.png
La imagen tiene un atributo ALT vacรญo; su nombre de archivo es goomba.png
/assets/entities/underground/goomba.png
/assets/blocks/overworld/mistery-block.png
/assets/blocks/underground/mistery-block.png
/assets/collectibles/overworld/fire-flower.png
/assets/collectibles/underground/fire-flower.png
/assets/collectibles/coin.png
/assets/collectibles/underground/ground-coin.png

Loading the assets (js/main/preload.js)

The provided code inside the “preload.js” file includes functions for preloading assets, initializing sounds, and creating animations.

The preload function is responsible for loading all necessary game assets before the game starts. It sets up a visual progress bar and percentage text to inform the user about the loading progress. Various assets such as images, spritesheets, fonts, and sound files are loaded. The function also includes logic to determine the style of the level (overworld or underground) randomly and loads the appropriate assets accordingly. Additionally, it loads several plugins required for the game.

The initSounds function initializes the game’s audio elements. It iterates over a list of sound assets, creates audio objects for each sound, and assigns them to the game instance. This function ensures that all sounds are ready to be played during the game, with background music starting to loop once the sounds are initialized.

The createAnimations function defines various animations for the game’s characters and objects. It creates both single-frame and multi-frame animations using the loaded spritesheets. Single-frame animations are static poses, while multi-frame animations include movements like running, walking, and item interactions. These animations are essential for bringing the game characters and elements to life, providing visual feedback and enhancing the gaming experience.

Overall, the following code prepares the game environment by loading all assets, initializing audio, and setting up animations:

function preload() {
    // Setup progress box, bar, and percent text
    const progressBox = this.add.graphics().fillStyle(0x222222, 1)
        .fillRoundedRect(screenWidth / 2.48, screenHeight / 2 * 1.05, screenWidth / 5.3, screenHeight / 20.7, 10);
    const progressBar = this.add.graphics();
    const percentText = this.make.text({
        x: this.cameras.main.width / 2,
        y: this.cameras.main.height / 2 * 1.25,
        text: '0%',
        style: {
            font: `${screenWidth / 96}px pixel_nums`,
            fill: '#ffffff'
        }
    }).setOrigin(0.5, 0.5);

    // Update progress bar and text on progress
    this.load.on('progress', (value) => {
        percentText.setText(value * 99 >= 99 ? 'Generating world...' : `Loading... ${parseInt(value * 99)}%`);
        progressBar.clear().fillStyle(0xffffff, 1)
            .fillRoundedRect(screenWidth / 2.45, screenHeight / 2 * 1.07, screenWidth / 5.6 * value, screenHeight / 34.5, 5);
    });

    // Clean up on load complete
    this.load.on('complete', () => {
        [progressBar, progressBox, percentText].forEach(item => item.destroy());
        loadingGif.forEach(gif => gif.style.display = 'none');
    });

    // Load Fonts and Plugins
    this.load.bitmapFont('carrier_command', 'assets/fonts/carrier_command.png', 'assets/fonts/carrier_command.xml');
    const plugins = ['rexvirtualjoystickplugin', 'rexcheckboxplugin', 'rexsliderplugin', 'rexkawaseblurpipelineplugin'];
    plugins.forEach(plugin => {
        this.load.plugin(plugin, `https://raw.githubusercontent.com/rexrainbow/phaser3-rex-notes/master/dist/${plugin}.min.js`, true);
    });

    // Determine level style
    isLevelOverworld = Phaser.Math.Between(0, 100) <= 50;
    const levelStyle = isLevelOverworld ? 'overworld' : 'underground';

    // Utility functions for loading assets
    const loadSpriteSheet = (path, frameWidth, frameHeight) => {
        this.load.spritesheet(path.split('/').pop(), `assets/${path}.png`, { frameWidth, frameHeight });
    };
    const loadImage = (path) => {
        this.load.image(path.split('/').pop(), `assets/${path}.png`);
    };

    // Load entity sprites
    [{ path: 'mario', frameWidth: 18, frameHeight: 16 },
    { path: 'mario-grown', frameWidth: 18, frameHeight: 32 },
    { path: 'mario-fire', frameWidth: 18, frameHeight: 32 },
    { path: `${levelStyle}/goomba`, frameWidth: 16, frameHeight: 16 },
    { path: 'koopa', frameWidth: 16, frameHeight: 24 },
    { path: 'shell', frameWidth: 16, frameHeight: 15 },
    { path: 'fireball', frameWidth: 8, frameHeight: 8 },
    { path: 'fireball-explosion', frameWidth: 16, frameHeight: 16 }]
        .forEach(item => loadSpriteSheet(`entities/${item.path}`, item.frameWidth, item.frameHeight));

    // Load collectibles
    [{ path: 'coin', frameWidth: 16, frameHeight: 16 },
    { path: 'underground/ground-coin', frameWidth: 10, frameHeight: 14 },
    { path: `${levelStyle}/fire-flower`, frameWidth: 16, frameHeight: 16 }]
        .forEach(item => loadSpriteSheet(`collectibles/${item.path}`, item.frameWidth, item.frameHeight));

    // Load animated blocks
    [{ path: `${levelStyle}/brick-debris`, frameWidth: 8, frameHeight: 8 },
    { path: `${levelStyle}/mistery-block`, frameWidth: 16, frameHeight: 16 },
    { path: 'overworld/custom-block', frameWidth: 16, frameHeight: 16 }]
        .forEach(item => loadSpriteSheet(`blocks/${item.path}`, item.frameWidth, item.frameHeight));

    // Load animated hud
    [{ path: 'npc', frameWidth: 16, frameHeight: 24 }]
        .forEach(hud => loadSpriteSheet(`hud/${hud.path}`, hud.frameWidth, hud.frameHeight));

    // Load mushrooms
    ['live', 'super']
        .forEach(item => loadImage(`collectibles/${item}-mushroom`));

    // Load normal scenery
    ['castle', 'flag-mast', 'final-flag', 'sign']
        .forEach(item => loadImage(`scenery/${item}`));

    // Load overworld scenery
    ['cloud1', 'cloud2', 'mountain1', 'mountain2', 'fence', 'bush1', 'bush2']
        .forEach(item => loadImage(`scenery/overworld/${item}`));

    // Load specific scenery
    ['floor-bricks']
        .forEach(item => loadImage(`scenery/${levelStyle}/${item}`));
    ['start-floor-bricks']
        .forEach(item => loadImage(`scenery/overworld/${item}`));

    // Load tubes
    ['horizontal', 'horizontal-final', 'vertical-small', 'vertical-medium', 'vertical-large', 'vertical-extra-large']
        .forEach(item => loadImage(`scenery/${item}-tube`));

    // Load HUD
    ['gear', 'settings-bubble']
        .forEach(item => loadImage(`hud/${item}`));

    // Load static blocks
    ['block', 'empty-block', 'immovable-block']
        .forEach(item => loadImage(`blocks/${levelStyle}/${item}`));
    ['construction-block']
        .forEach(item => loadImage(`blocks/underground/${item}`));
    

    // Load sounds (music and effects)
    this.sounds = [
        { path: 'music/overworld/overworld.mp3', volume: 0.15 },
        { path: 'music/underground/underground.mp3', volume: 0.15 },
        { path: `music/${levelStyle}/hurry-up.mp3`, volume: 0.15 },
        { path: 'music/game-over.mp3', volume: 0.3 },
        { path: 'music/win.wav', volume: 0.3 },
        { path: 'effects/jump.mp3', volume: 0.1 },
        { path: 'effects/coin.mp3', volume: 0.2 },
        { path: 'effects/power-up-appears.mp3', volume: 0.2 },
        { path: 'effects/consume-power-up.mp3', volume: 0.2 },
        { path: 'effects/power-down.mp3', volume: 0.3 },
        { path: 'effects/goomba-stomp.wav', volume: 1 },
        { path: 'effects/flagpole.mp3', volume: 0.3 },
        { path: 'effects/fireball.mp3', volume: 0.3 },
        { path: 'effects/kick.mp3', volume: 0.3 },
        { path: 'effects/time-warning.mp3', volume: 0.2 },
        { path: 'effects/pause.wav', volume: 0.17 },
        { path: 'effects/block-bump.wav', volume: 0.3 },
        { path: 'effects/break-block.wav', volume: 0.5 },
        { path: Phaser.Math.Between(0, 100) < 98 ? 'effects/here-we-go.mp3' : 'effects/cursed/here-we-go.mp3', volume: 0.17 }
    ];

    const generateKey = path => path.split('/').pop().split('.')[0].replace(/-./g, match => match.charAt(1).toUpperCase()) + 'Sound';
    this.sounds.forEach(sound => {
        sound.key = generateKey(sound.path);
        this.load.audio(sound.key, `assets/sound/${sound.path}`);
    });
}

function initSounds() {
    this.sounds.forEach(sound => {
        this[sound.key] = this.sound.add(sound.key, { volume: sound.volume });
    });
    this.overworldSound.play({ loop: -1 });
}

function createAnimations() {
    const singleFrameAnimations = [
        { key: 'idle', target: 'mario', frame: 0 },
        { key: 'hurt', target: 'mario', frame: 4 },
        { key: 'jump', target: 'mario', frame: 5 },
        { key: 'grown-mario-idle', target: 'mario-grown', frame: 0 },
        { key: 'grown-mario-crouch', target: 'mario-grown', frame: 4 },
        { key: 'grown-mario-jump', target: 'mario-grown', frame: 5 },
        { key: 'fire-mario-idle', target: 'mario-fire', frame: 0 },
        { key: 'fire-mario-crouch', target: 'mario-fire', frame: 4 },
        { key: 'fire-mario-jump', target: 'mario-fire', frame: 5 },
        { key: 'fire-mario-throw', target: 'mario-fire', frame: 6 },
        { key: 'goomba-idle', target: 'goomba', frame: 1 },
        { key: 'goomba-hurt', target: 'goomba', frame: 2 },
        { key: 'koopa-idle', target: 'koopa', frame: 1 },
        { key: 'koopa-hurt', target: 'koopa', frame: 0 },
        { key: 'koopa-shell', target: 'koopa', frame: 1 },
        { key: 'fireball-left-down', target: 'fireball', frame: 0 },
        { key: 'fireball-left-up', target: 'fireball', frame: 1 },
        { key: 'fireball-right-down', target: 'fireball', frame: 2 },
        { key: 'fireball-right-up', target: 'fireball', frame: 3 },
        { key: 'fireball-explosion-1', target: 'fireball-explosion', frame: 0 },
        { key: 'fireball-explosion-2', target: 'fireball-explosion', frame: 1 },
        { key: 'fireball-explosion-3', target: 'fireball-explosion', frame: 2 },
    ];

    const multiFrameAnimations = [
        { key: 'run', target: 'mario', start: 3, end: 1, frameRate: 12, repeat: -1 },
        { key: 'grown-mario-run', target: 'mario-grown', start: 3, end: 1, frameRate: 12, repeat: -1 },
        { key: 'fire-mario-run', target: 'mario-fire', start: 3, end: 1, frameRate: 12, repeat: -1 },
        { key: 'goomba-walk', target: 'goomba', start: 0, end: 1, frameRate: 8, repeat: -1 },
        { key: 'koopa-walk', target: 'koopa', start: 0, end: 1, frameRate: 8, repeat: -1 },
        { key: 'coin-default', target: 'coin', start: 0, end: 3, frameRate: 10, repeat: -1 },
        { key: 'ground-coin-default', target: 'ground-coin', start: 2, end: 0, frameRate: 5, repeat: -1, repeatDelay: 5 },
        { key: 'mistery-block-default', target: 'mistery-block', start: 2, end: 0, frameRate: 5, repeat: -1, repeatDelay: 5 },
        { key: 'custom-block-default', target: 'custom-block', start: 2, end: 0, frameRate: 5, repeat: -1, repeatDelay: 5 },
        { key: 'brick-debris-default', target: 'brick-debris', start: 0, end: 3, frameRate: 4, repeat: -1 },
        { key: 'fire-flower-default', target: 'fire-flower', start: 0, end: 3, frameRate: 10, repeat: -1 },
        { key: 'npc-default', target: 'npc', start: 0, end: 1, frameRate: 2, repeat: -1, repeatDelay: 10 },
    ];

    singleFrameAnimations.forEach(({ key, target, frame }) => {
        this.anims.create({
            key,
            frames: [{ key: target, frame }]
        });
    });

    multiFrameAnimations.forEach(({ key, target, start, end, frameRate, repeat, repeatDelay = 0 }) => {
        this.anims.create({
            key,
            frames: this.anims.generateFrameNumbers(target, { start, end }),
            frameRate,
            repeat,
            repeatDelay
        });
    });
}

Drawing the blocks and coins (js/game/structures.js)

The function generateStructure is designed to create and display different elements (blocks, coins, etc.) on the screen based on a predefined matrix layout. The key steps and components are as follows:

  1. Element addition functions: Several helper functions (addBlock, addConstructionBlock, addImmovableBlock, addMisteryBlock, addCoin) are defined to add different types of game elements (blocks, mystery blocks, immovable blocks, coins) to their respective groups and scale them appropriately.
  2. Level layouts: The levels object contains predefined matrices for different types of levels (overworld and underworld). Each matrix defines the placement of blocks (‘B’), mystery blocks (‘M’), immovable blocks (‘I’), coins (‘C’), and construction blocks (‘X’).
  3. Random level selection: A random matrix is selected from the levels object based on whether the level is overworld or underworld.
  4. Drawing the matrix: The drawMatrix function iterates over the selected matrix, calculates the position for each element, and uses the helper functions to add the elements to the screen.

In the following source code, each matrix is used to define the layout of game elements in a clear and structured way, and the function dynamically generates the game level based on these definitions:

function generateStructure(pieceStart) {
    const scale = screenHeight / 345;

    const addBlock = (x, y) =>
        this.blocksGroup.add(this.add.image(x, y, 'block').setScale(scale));

    const addConstructionBlock = (x, y) =>
        this.constructionBlocksGroup.add(this.add.image(x, y, 'construction-block').setScale(scale));

    const addImmovableBlock = (x, y) =>
        this.immovableBlocksGroup.add(this.add.image(x, y, 'immovable-block').setScale(scale));

    const addMisteryBlock = (x, y) =>
        this.misteryBlocksGroup.add(this.add.sprite(x, y, 'mistery-block').setScale(scale));

    const addCoin = (x, y) =>
        this.groundCoinsGroup.add(this.physics.add.sprite(x, y, 'ground-coin').setScale(scale));

    const levels = {
        overworld: [
            [
                [' ', ' ', ' ', ' ', ' ', ' ', ' ', ' ', ' ', ' ', ' ', ' ', ' '],
                [' ', 'B', 'M', 'B', ' ', ' ', ' ', ' ', ' ', 'B', 'M', 'B', ' '],
                [' ', ' ', ' ', ' ', ' ', ' ', ' ', ' ', ' ', ' ', ' ', ' ', ' '],
                [' ', ' ', ' ', ' ', ' ', ' ', ' ', ' ', ' ', ' ', ' ', ' ', ' '],
                [' ', ' ', ' ', ' ', ' ', ' ', ' ', ' ', ' ', ' ', ' ', ' ', ' '],
                [' ', ' ', ' ', ' ', 'B', 'B', 'M', 'B', 'B', ' ', ' ', ' ', ' '],
                [' ', ' ', ' ', ' ', ' ', ' ', ' ', ' ', ' ', ' ', ' ', ' ', ' '],
                [' ', ' ', ' ', ' ', ' ', ' ', ' ', ' ', ' ', ' ', ' ', ' ', ' '],
                [' ', ' ', ' ', ' ', ' ', ' ', ' ', ' ', ' ', ' ', ' ', ' ', ' '],
            ],
            [
                [' ', ' ', ' ', ' ', ' ', ' ', ' ', ' ', ' ', ' ', ' '],
                [' ', ' ', ' ', ' ', 'B', 'M', 'B', ' ', ' ', ' ', ' '],
                [' ', ' ', ' ', ' ', ' ', ' ', ' ', ' ', ' ', ' ', ' '],
                [' ', ' ', ' ', ' ', ' ', ' ', ' ', ' ', ' ', ' ', ' '],
                [' ', ' ', ' ', ' ', ' ', ' ', ' ', ' ', ' ', ' ', ' '],
                [' ', 'B', 'M', 'B', ' ', ' ', ' ', 'B', 'M', 'B', ' '],
                [' ', ' ', ' ', ' ', ' ', ' ', ' ', ' ', ' ', ' ', ' '],
                [' ', ' ', ' ', ' ', ' ', ' ', ' ', ' ', ' ', ' ', ' '],
                [' ', ' ', ' ', ' ', ' ', ' ', ' ', ' ', ' ', ' ', ' '],
            ],
            [
                [' ', ' ', ' ', ' ', ' ', ' ', ' ', ' ', ' ', ' ', ' '],
                [' ', ' ', ' ', ' ', ' ', 'M', ' ', ' ', ' ', ' ', ' '],
                [' ', ' ', ' ', ' ', ' ', ' ', ' ', ' ', ' ', ' ', ' '],
                [' ', ' ', ' ', ' ', ' ', ' ', ' ', ' ', ' ', ' ', ' '],
                [' ', ' ', ' ', ' ', ' ', ' ', ' ', ' ', ' ', ' ', ' '],
                [' ', ' ', ' ', 'B', 'M', 'B', 'M', 'B', ' ', ' ', ' '],
                [' ', ' ', ' ', ' ', ' ', ' ', ' ', ' ', ' ', ' ', ' '],
                [' ', ' ', ' ', ' ', ' ', ' ', ' ', ' ', ' ', ' ', ' '],
                [' ', ' ', ' ', ' ', ' ', ' ', ' ', ' ', ' ', ' ', ' '],
            ],
            [
                [' ', ' ', ' ', ' ', ' ', ' ', ' ', ' '],
                [' ', ' ', 'B', 'M', 'M', 'B', ' ', ' '],
                [' ', ' ', ' ', ' ', ' ', ' ', ' ', ' '],
                [' ', ' ', ' ', ' ', ' ', ' ', ' ', ' '],
                [' ', ' ', ' ', ' ', ' ', ' ', ' ', ' '],
                [' ', ' ', ' ', 'B', 'B', ' ', ' ', ' '],
                [' ', ' ', ' ', ' ', ' ', ' ', ' ', ' '],
                [' ', ' ', ' ', ' ', ' ', ' ', ' ', ' '],
                [' ', ' ', ' ', ' ', ' ', ' ', ' ', ' '],
            ],
            [
                [' ', ' ', ' ', ' ', ' ', ' ', ' ', ' ', ' '],
                [' ', ' ', ' ', ' ', 'M', ' ', ' ', ' ', ' '],
                [' ', ' ', ' ', ' ', ' ', ' ', ' ', ' ', ' '],
                [' ', ' ', ' ', ' ', ' ', ' ', ' ', ' ', ' '],
                [' ', ' ', ' ', ' ', ' ', ' ', ' ', ' ', ' '],
                [' ', 'M', ' ', ' ', 'M', ' ', ' ', 'M', ' '],
                [' ', ' ', ' ', ' ', ' ', ' ', ' ', ' ', ' '],
                [' ', ' ', ' ', ' ', ' ', ' ', ' ', ' ', ' '],
                [' ', ' ', ' ', ' ', ' ', ' ', ' ', ' ', ' '],
            ],
            [
                [' ', ' ', ' ', ' ', ' ', ' ', ' ', ' '],
                [' ', ' ', ' ', ' ', ' ', ' ', ' ', ' '],
                [' ', ' ', ' ', ' ', ' ', ' ', ' ', ' '],
                [' ', ' ', ' ', ' ', ' ', ' ', ' ', ' '],
                [' ', ' ', ' ', ' ', ' ', ' ', ' ', ' '],
                [' ', ' ', 'B', 'B', 'M', 'B', ' ', ' '],
                [' ', ' ', ' ', ' ', ' ', ' ', ' ', ' '],
                [' ', ' ', ' ', ' ', ' ', ' ', ' ', ' '],
                [' ', ' ', ' ', ' ', ' ', ' ', ' ', ' '],
            ],
        ],
        underworld: [
            [
                [' ', ' ', ' ', ' ', ' ', ' ', ' '],
                [' ', ' ', ' ', ' ', ' ', ' ', ' '],
                [' ', ' ', ' ', ' ', ' ', ' ', ' '],
                [' ', ' ', ' ', ' ', ' ', ' ', ' '],
                [' ', ' ', ' ', ' ', ' ', ' ', ' '],
                [' ', 'M', 'M', 'M', 'M', 'M', ' '],
                [' ', ' ', ' ', ' ', ' ', ' ', ' '],
                [' ', ' ', ' ', ' ', ' ', ' ', ' '],
                [' ', ' ', ' ', ' ', ' ', ' ', ' '],
            ],
            [
                [' ', ' ', ' ', ' ', ' ', ' ', ' ', ' ', ' ', ' ', ' '],
                [' ', ' ', ' ', ' ', ' ', ' ', ' ', ' ', ' ', ' ', ' '],
                [' ', ' ', ' ', ' ', ' ', ' ', ' ', ' ', ' ', ' ', ' '],
                [' ', ' ', ' ', ' ', ' ', ' ', ' ', ' ', ' ', ' ', ' '],
                [' ', ' ', ' ', ' ', ' ', ' ', ' ', ' ', ' ', ' ', ' '],
                [' ', ' ', ' ', ' ', ' ', ' ', 'I', ' ', ' ', ' ', 'M'],
                [' ', ' ', ' ', ' ', 'I', ' ', 'I', ' ', 'I', ' ', ' '],
                [' ', ' ', 'I', ' ', 'I', ' ', 'I', ' ', 'I', ' ', ' '],
                ['I', ' ', 'I', ' ', 'I', ' ', 'I', ' ', 'I', ' ', ' '],
            ],
            [
                [' ', ' ', ' ', ' ', ' ', ' ', ' ', ' ', ' ', ' '], 
                [' ', ' ', ' ', ' ', ' ', ' ', ' ', ' ', ' ', ' '], 
                [' ', ' ', ' ', 'C', 'C', 'C', 'C', ' ', ' ', ' '], 
                [' ', ' ', ' ', 'X', 'X', 'X', 'X', ' ', 'X', ' '], 
                [' ', ' ', 'C', 'X', ' ', ' ', 'X', 'C', 'X', ' '], 
                [' ', 'X', 'X', 'X', ' ', ' ', 'X', 'X', 'X', ' '],
                [' ', ' ', ' ', ' ', ' ', ' ', ' ', ' ', ' ', ' '], 
                [' ', ' ', ' ', ' ', ' ', ' ', ' ', ' ', ' ', ' '],
                [' ', ' ', ' ', ' ', ' ', ' ', ' ', ' ', ' ', ' '], 
            ],
            [
                [' ', ' ', 'M', 'M', ' ', ' ', ' ', ' ', ' ', ' ', ' '], 
                [' ', ' ', ' ', ' ', ' ', ' ', ' ', ' ', ' ', ' ', ' '], 
                [' ', ' ', ' ', ' ', ' ', ' ', ' ', ' ', ' ', ' ', ' '], 
                [' ', ' ', ' ', ' ', ' ', ' ', ' ', ' ', ' ', ' ', ' '], 
                [' ', ' ', ' ', ' ', ' ', ' ', ' ', ' ', ' ', ' ', ' '], 
                [' ', ' ', 'M', 'M', ' ', ' ', 'M', 'M', 'M', ' ', ' '],
                [' ', ' ', ' ', ' ', ' ', ' ', ' ', ' ', ' ', ' ', ' '], 
                [' ', ' ', ' ', ' ', ' ', ' ', ' ', ' ', ' ', ' ', ' '], 
                [' ', ' ', ' ', ' ', ' ', ' ', ' ', ' ', ' ', ' ', ' '], 
            ],
            [
                [' ', ' ', ' ', ' ', ' ', ' ', ' ', ' ', ' ', ' '],
                [' ', ' ', ' ', ' ', ' ', ' ', ' ', ' ', ' ', ' '],
                [' ', ' ', ' ', ' ', ' ', ' ', ' ', ' ', ' ', ' '],
                [' ', ' ', ' ', ' ', ' ', ' ', ' ', ' ', ' ', ' '],
                [' ', ' ', ' ', 'C', 'C', 'C', 'C', ' ', ' ', ' '],
                [' ', ' ', ' ', 'B', 'B', 'B', 'B', ' ', ' ', ' '],
                [' ', ' ', ' ', ' ', ' ', ' ', ' ', ' ', ' ', ' '],
                [' ', ' ', ' ', ' ', ' ', ' ', ' ', ' ', ' ', ' '],
                [' ', ' ', ' ', ' ', ' ', ' ', ' ', ' ', ' ', ' '],
            ],
            [
                [' ', ' ', ' ', ' ', ' ', ' ', ' ', ' ', ' ', ' '],
                [' ', ' ', ' ', ' ', ' ', ' ', ' ', ' ', ' ', ' '],
                [' ', ' ', ' ', ' ', ' ', ' ', ' ', ' ', ' ', ' '],
                [' ', ' ', ' ', ' ', ' ', ' ', ' ', ' ', ' ', ' '],
                [' ', 'C', 'C', 'C', 'C', 'C', 'C', 'C', 'C', ' '],
                [' ', 'B', 'B', 'B', 'B', 'B', 'B', 'B', 'B', ' '],
                [' ', ' ', ' ', ' ', ' ', ' ', ' ', ' ', ' ', ' '],
                [' ', ' ', ' ', ' ', ' ', ' ', ' ', ' ', ' ', ' '],
                [' ', ' ', ' ', ' ', ' ', ' ', ' ', ' ', ' ', ' '],
            ],
        ]
    };

    const random = Phaser.Math.Between(0, 5);
    const getMatrix = () => isLevelOverworld ? levels.overworld[random] : levels.underworld[random];
    
    const drawMatrix = (matrix) => {
        const blockSize = 16 * scale;
        matrix.forEach((row, rowIndex) => {
            const y = (screenHeight - platformHeight) + (rowIndex * blockSize) - (8.5 * blockSize);
            row.forEach((cell, colIndex) => {
                const x = pieceStart + (colIndex * blockSize) - (4.5 * blockSize);
                
                if (cell === 'B') addBlock(x, y);
                if (cell === 'M') addMisteryBlock(x, y);
                if (cell === 'I') addImmovableBlock(x, y);
                if (cell === 'C') addCoin(x, y);
                if (cell === 'X') addConstructionBlock(x, y);
            });
        });
    };

    const matrix = getMatrix();
    drawMatrix(matrix);

    return isLevelOverworld ? Phaser.Math.Between(1, 3) : 1;
}

Download the source code and the assets

Inside this ZIP file, you will find all the files containing the source code and all the necessary assets to run the game on your own. The structure of the ZIP file is organized as follows:

  • index.html: This is the main HTML file that serves as the entry point for the game.
  • css: This folder includes the CSS file used for styling the HTML elements of the game interface.
  • js: This folder contains all the JavaScript files that comprise the game’s source code, including:
    • main/preload.js: Handles the loading of all game assets, such as images and sprite sheets.
    • game/structures.js: Defines the structure and layout of the game levels.
    • Other JavaScript files that implement the game logic and mechanics.
  • assets: This folder contains all the graphical and audio assets needed for the game, such as images, sprite sheets, and sound files.

This organization ensures that you have a clear structure for all components of the game, making it easy to understand, modify, and run the game on your own system.

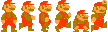
Proposed exercise: Customizing the Mario character

You may easily customize the Mario character by simply overwriting the images and defining the new sprite sizes (if changed). You need to update the relevant parts of the preload.js file (under the js/main folder). The source code remains mostly the same unless you need to adjust frame-specific size and animations, which might require changes based on your custom sprite sheet. Here are the specific steps you need to follow:

  1. Update the images: Change the following images. You may replace them by a new ones, or you can update the ones provided using Pixelorama:
  • /assets/entities/mario.png
  • /assets/entities/mario-grown.png
  • /assets/entities/mario-fire.png
  1. Update frame dimensions inside preload.js file: Replace the width and height of the Mario sprites with the new frame dimensions (if changed):
// Load entity sprites
[{ path: 'mario', frameWidth: 18, frameHeight: 16 },
 { path: 'mario-grown', frameWidth: 18, frameHeight: 32 },
 { path: 'mario-fire', frameWidth: 18, frameHeight: 32 },
 ...
  1. Update animations inside preload.js file: Ensure that the animation definitions use the new sprites correctly. You may change the start and end frames, and also the frameRate:
const multiFrameAnimations = [
   { key: 'run', target: 'mario', start: 3, end: 1, frameRate: 12, repeat: -1 },
   { key: 'grown-mario-run', target: 'mario-grown', start: 3, end: 1, frameRate: 12, repeat: -1 },
   { key: 'fire-mario-run', target: 'mario-fire', start: 3, end: 1, frameRate: 12, repeat: -1 },
   ...

By updating these lines, you can ensure that your custom Mario sprite is loaded with the new dimensions and integrated into the game’s existing animations.

Proposed exercise: Defining your own levels

To define your own levels, you need to update the structures.js file (under the js/game folder) to include your custom level designs. Here are the steps and the specific lines of code to add new levels or update the existing ones:

  1. Define new levels: Add new level arrays to the levels.overworld and levels.underworld arrays.
  2. Adjust block types: Use ‘B’ for normal blocks, ‘M’ for mystery blocks, ‘I’ for immovable blocks, ‘C’ for coins, and ‘X’ for construction blocks.
  3. Update random selector: If you add more than six levels, adjust the Phaser.Math.Between(0, 5) to match the number of levels you have.

This is the code you should modify inside the structures.js file:

function generateStructure(pieceStart) {
    // Existing code...

    const levels = {
        overworld: [
            // Existing level definitions
            [
                [' ', ' ', ' ', ' ', ' ', ' ', ' ', ' ', ' ', ' ', ' ', ' ', ' '],
                [' ', 'C', 'M', 'C', ' ', ' ', ' ', ' ', ' ', 'B', 'M', 'B', ' '],
                [' ', ' ', ' ', ' ', ' ', ' ', ' ', ' ', ' ', ' ', ' ', ' ', ' '],
                [' ', ' ', ' ', ' ', ' ', ' ', ' ', ' ', ' ', ' ', ' ', ' ', ' '],
                [' ', ' ', ' ', ' ', ' ', ' ', ' ', ' ', ' ', ' ', ' ', ' ', ' '],
                [' ', ' ', ' ', ' ', 'B', 'B', 'M', 'B', 'B', ' ', ' ', ' ', ' '],
                [' ', ' ', ' ', ' ', ' ', ' ', ' ', ' ', ' ', ' ', ' ', ' ', ' '],
                [' ', ' ', ' ', ' ', ' ', ' ', ' ', ' ', ' ', ' ', ' ', ' ', ' '],
                [' ', ' ', ' ', ' ', ' ', ' ', ' ', ' ', ' ', ' ', ' ', ' ', ' '],
            ],
            // Add more custom levels as needed...
        ],
        underworld: [
            // Existing level definitions
            [
                [' ', ' ', ' ', ' ', ' ', ' ', ' ', ' ', ' ', ' '],
                [' ', ' ', ' ', ' ', 'C', ' ', ' ', ' ', ' ', ' '],
                [' ', ' ', ' ', ' ', ' ', ' ', ' ', ' ', ' ', ' '],
                [' ', ' ', ' ', ' ', ' ', ' ', ' ', ' ', ' ', ' '],
                [' ', ' ', ' ', ' ', ' ', ' ', ' ', ' ', ' ', ' '],
                [' ', ' ', 'M', 'B', 'M', ' ', 'M', 'B', 'M', ' '],
                [' ', ' ', ' ', ' ', ' ', ' ', ' ', ' ', ' ', ' '],
                [' ', ' ', ' ', ' ', ' ', ' ', ' ', ' ', ' ', ' '],
                [' ', ' ', ' ', ' ', ' ', ' ', ' ', ' ', ' ', ' '],
            ],
            // Add more custom levels as needed...
        ]
    };

    // Existing code to select and draw the level
    const random = Phaser.Math.Between(0, 5);
    ...
}

By following these instructions, you can easily define and customize your own levels in the Mario game.

Enjoy the game!

You can enjoy playing this game online here.

Phaser. Unit 11. Emoji generator

Introduction

The main goal of this unit is to provide a fun and simple game where users can add and see their favorite emojis on the screen interacting with them in a dynamic way. These will be the main features:

  1. Emoji Selection: Players can choose from different categories of emojis (like smileys, animals, food, etc.).
  2. Adding Emojis: By clicking on the screen, players can place random emojis from the selected category onto the game area.
  3. Interactive Movement: The emojis have physics applied to them, meaning they can bounce around the screen and respond to movements.
  4. Device Motion Interaction: If played on a device with motion sensors (like a smartphone), the game can respond to tilts and shakes, making the emojis move accordingly.

CSS code (style.css)

The CSS file styles the web page for the game as follows:

  • Full-Screen Game Display (html, body): Sets the width and height to 100%, removes any margins and padding, hides scrollbars, sets the font to Arial, and the text color to white.
  • Top-Positioned Elements: (#reload, #numEmojis, #categorySelect): Positions the reload button, emoji counter, and category dropdown at the top of the page with a small top margin.
  • Specific Element Positioning:
    • #reload: Places the reload button at the top left.
    • #numEmojis: Centers the emoji counter horizontally at the top.
    • #categorySelect: Positions the category dropdown at the top right.
  • Centered Instructions (#instructions): Centers the instructions text both horizontally and vertically in the middle of the screen.

This CSS code ensures the game takes up the entire screen, with the controls easily accessible at the top and the instructions clearly visible in the center:

/* Remove any margin and padding and disable scrollbars to fill the screen with the game */
html, body {
  width: 100%;
  height: 100%;
  margin: 0;
  padding: 0;
  overflow: hidden;
  font-family: arial;
  color: white;
}

/* The reload button, the counter and the dropdown are positioned at the top */
#reload, #numEmojis, #categorySelect {
  position: absolute;
  top: 5px;
  padding: 2px 4px; /* Add some padding for better readability */
  border-radius: 4px; /* Add rounded corners */
}

/* The reload button is positioned at the left */
#reload {
  left: 5px;
}

/* The counter of emojis is positioned at the center */
#numEmojis {
  left: 50%;
  transform: translateX(-50%);
  background-color: rgba(0, 0, 0, 0.75); /* Add a semi-transparent black background */
}

/* The select dropdown is positioned at the right side */
#categorySelect {
  right: 5px;
}

/* The instructions are positioned at the center of the screen */
#instructions {
  position: absolute;
  left: 50%;
  top: 50%;
  text-align: center;
  transform: translate(-50%, -50%);
}

HTML code (index.html)

The HTML code sets up the web page, including a reload button, an emoji counter, a category selection dropdown, and an instruction display. It uses the Phaser game framework for the interactive game elements and includes links to the necessary JavaScript and CSS files:

<!DOCTYPE html>
<html lang="en">

<head>
  <meta charset="UTF-8">
  <meta name="viewport" content="width=device-width, initial-scale=1.0">
  <title>Emojis</title>
  <link rel="stylesheet" href="style.css">
</head>

<body>
  <!-- ๐Ÿ”„ Button to reload the game -->
  <button id="reload" onclick="reload()">Reload</button>
  
  <!-- ๐Ÿ”ข Display the number of emojis added -->
  <div id="numEmojis">0</div>
  
  <!-- ๐Ÿ”ฝ Dropdown to select emoji categories -->
  <select id="categorySelect"></select>
  
  <!-- โ„น๏ธ Instructions for the user -->
  <div id="instructions">Click to add emojis ๐Ÿคช</div>
  
  <!-- ๐ŸŽฎ Container for the game -->
  <div id="gameContainer"></div>
  
  <!-- ๐Ÿ“œ Load Phaser library -->
  <script src="https://cdn.jsdelivr.net/npm/[email protected]/dist/phaser.min.js"></script>
  
  <!-- ๐Ÿ“œ Load game scripts -->
  <script src="create.js"></script>
  <script src="update.js"></script>
  <script src="config.js"></script>
</body>

</html>

Constants and Phaser configuration (config.js)

Inside the config.js file we will define the various categories of emojis, each one containing a specific list. Those categories will be displayed using a dropdown menu to allow user selection.

We will also set up the game configuration, specifying the parent container, the scaling mode to ensure the game resizes correctly, and the physics engine to be used (Matter.js), to achieve a real movement and bouncing of the emojis around the screen.

Also inside this file we will link the gameโ€™s lifecycle methods (create and update) to their respective functions defined in other JavaScript files:

// ๐ŸŽญ Define emoji categories with different types of emojis
const emojiCategories = {
  Smileys: ['๐Ÿ˜€', '๐Ÿคฉ', '๐Ÿ˜„', '๐Ÿ˜', '๐Ÿ˜†', '๐Ÿ˜…', '๐Ÿฅฐ', '๐Ÿคฃ', '๐Ÿ˜Š', '๐Ÿ˜‡'],
  Body: ['๐Ÿ‘„', '๐Ÿ‘Œ', '๐Ÿซ€', '๐Ÿฆด', '๐Ÿซ', '๐Ÿฆท', '๐Ÿคณ', '๐Ÿ‘‹', '๐Ÿ‘', '๐Ÿ‘€'],
  People: ['๐Ÿ’‚', '๐Ÿฅท', '๐Ÿง™', '๐Ÿง›', '๐Ÿงœ', '๐Ÿง', '๐ŸงŸ', '๐Ÿ•ต', '๐Ÿ‘ฒ', '๐ŸŽ…'],
  Animals: ['๐Ÿชฐ', '๐Ÿ', '๐Ÿ‚', '๐Ÿฆ‚', '๐Ÿ„', '๐Ÿ…', '๐Ÿ', '๐Ÿ‡', '๐Ÿˆ', '๐Ÿ‰'],
  Travel: ['๐Ÿš€', '๐Ÿš', '๐Ÿš‚', '๐Ÿšƒ', 'โ›ต', '๐Ÿ›ธ', '๐Ÿšฒ', '๐Ÿš’', '๐Ÿš—', 'โœˆ'],
  Activities: ['๐Ÿ“', '๐ŸŽฏ', 'โšฝ', '๐Ÿช', '๐ŸŽฒ', '๐Ÿ€', '๐ŸŽท', '๐ŸŽธ', '๐ŸŽน', '๐ŸŽบ'],
  Food: ['๐ŸŒญ', '๐Ÿ•', '๐Ÿ”', '๐ŸŸ', '๐Ÿ—', '๐Ÿฉ', '๐Ÿฌ', '๐Ÿœ', '๐Ÿฅ—', '๐Ÿง€'],
  Objects: ['โ˜Ž', '๐Ÿ””', '๐Ÿ‘“', '๐Ÿ”', '๐Ÿ’ก', '๐Ÿ“•', '๐Ÿชœ', '๐Ÿ“ท', '๐Ÿ’Ž', '๐Ÿฉป']
};

// ๐Ÿ“‘ Get the category select element from the DOM
let categorySelect = document.getElementById('categorySelect');

// ๐ŸŽฎ Initialize the Phaser game with the specified configuration
let game = new Phaser.Game({
  parent: 'gameContainer', // Container for the game
  type: Phaser.AUTO, // Automatically choose WebGL or Canvas
  scale: {
    mode: Phaser.Scale.RESIZE, // Adjust the game scale when resizing
  },
  physics: {
    default: 'matter' // Use Matter.js physics engine
  },
  scene: {
    create: create, // Call the create function to set up the game
    update: update, // Call the update function to handle game logic
  },
});

Setting up category select dropdown and the game boundaries (create.js)

The create.js file defines the setup function for the emoji game, responsible for initializing various game elements. It creates a group to hold the emoji objects and populates a dropdown menu with all the emoji categories. It sets the boundaries for the physics world to ensure that emojis stay within the game area. The file also includes an event listener for device motion, allowing the game to respond to accelerometer data for added interactivity. This setup ensures the game is ready to handle user input, display emojis, and respond dynamically to both user actions and device movements:

function create() {
  // ๐Ÿ‘ฅ Create a group to hold the emoji sprites
  this.emojis = this.add.group();

  // ๐Ÿท๏ธ Populate the category select dropdown with emoji categories
  for (const category in emojiCategories) {
    const option = document.createElement('option');
    option.value = option.textContent = category;
    categorySelect.appendChild(option);
  }

  // ๐Ÿ“ Set the boundaries of the game world and
  // ๐Ÿ“ adjust the boundaries when the game is resized
  this.matter.world.setBounds();
  this.scale.on('resize', () => this.matter.world.setBounds());

  // ๐Ÿ“ฑ Handle device motion events to move emojis (special code is added for Apple devices)
  if (DeviceMotionEvent.requestPermission) {
    document.getElementById("instructions").innerHTML +=
      `<br><button onclick="DeviceMotionEvent.requestPermission().then(permission => { 
        if (permission === 'granted') {
          window.addEventListener('devicemotion', (event) => handleMotion.call(game.scene.keys.default, event, -1));
          this.remove();
        }})">Allow device motion</button>`;
  } else {
    window.addEventListener('devicemotion', (event) => handleMotion.call(this, event));
  }
}

Adding emojis and handling device movement (update.js)

The update.js file defines the main update loop and event handling for the emoji game. It includes functionality for detecting when the user clicks or touches the screen, which adds a randomly selected emoji from the chosen category to the game area. Each added emoji has physics properties applied, allowing it to move and interact within the game world. The file also includes a function to handle device motion, applying forces to the emojis based on accelerometer data. Additionally, it provides a function to reload the page, ensuring the game can be reset easily. This file is crucial for managing user interactions and the dynamic behavior of the emojis during gameplay:

function update() {
  const pointer = this.input.activePointer;

  // ๐Ÿ–ฑ๏ธ Check if the mouse button is pressed
  if (pointer.isDown) {
    // ๐Ÿ“ณ Vibrate the device if supported
    if (navigator.vibrate) navigator.vibrate(25);

    // ๐ŸŽฒ Get a random emoji from the selected category
    const emojisInCategory = emojiCategories[categorySelect.value];
    const randomEmoji = emojisInCategory[Phaser.Math.Between(0, emojisInCategory.length - 1)];

    // ๐ŸŽจ Add the emoji to the game at the pointer position
    const textEmoji = this.add.text(pointer.worldX, pointer.worldY, randomEmoji, { fontSize: 32 }).setPadding(4);
    const circleEmoji = this.matter.add.circle(pointer.worldX, pointer.worldY, 16, { restitution: 1, friction: 0.25 });

    // ๐ŸŒ€ Add physics to the emoji
    this.matter.add.gameObject(textEmoji, circleEmoji);
    this.matter.setVelocity(circleEmoji, Phaser.Math.Between(-10, 10), Phaser.Math.Between(-10, 10));

    // ๐Ÿท๏ธ Add the emoji to the emojis group
    this.emojis.add(textEmoji);
    document.getElementById('numEmojis').innerText++;
  }
}

function handleMotion(event, factor = 1.0) {
  const { x, y } = event.accelerationIncludingGravity;

  // ๐Ÿƒ Apply motion forces to the emojis based on device movement
  this.emojis.children.iterate(emoji => {
    const body = emoji.body;
    const force = 0.00025 * body.mass * factor;

    this.matter.body.applyForce(body, { x: body.position.x, y: body.position.y }, { x: -x * force, y: y * force });
  });
}

// ๐Ÿ”„ Reload the page
function reload() {
  if (confirm("Reload the page?")) location.reload();
}

Proposed exercise: Using your preferred emojis

Create a new version of the game using your preferred emojis. You can change the existing emojis, or add more emojis to each category or even insert new categories (i.e. drinks, flags, zodiac signs, etc.). Additionally, you can add background music or make any other changes you like.

Do not forget to create all the files required to run the code in this unit:

  • style.css
  • index.html
  • create.js
  • update.js
  • config.js

You may find the whole list of emojis at OpenMoji, and you can just copy and paste any emoji you like into the config.js file.

Enjoy the game!

You can enjoy playing this simple and funny game online here.

Phaser. Unit 10. Halloween merge game

Introduction

In this unit we will develop a game to merge objects inspired by the Suika Game, also known as the Watermelon Game. Although our game will be quite similar, it will feature a Halloween theme, from this specific Suika Clone version:

Halloween

CSS code (styles.css)

We are going to insert some CSS code to remove any margin and padding, as well as the scrollbars, to ensure that the maximum window size is used when the game starts. We will also display an image as the background for the game and we will define some border-radius to smooth the corners of the headstone:

body {
  height: 100vh;
  margin: 0;
  overflow: hidden;
  background-image: url(assets/background.jpg);
  background-size: cover;
}

canvas {
  border-radius: 20px;
}

HTML code (index.html)

The HTML source code inside the “index.html” file must be structured to link all necessary resources and scripts required to run the game:

  • preload.js will be responsible for loading all assets (images, sounds, etc.) before the game starts.
  • create.js will set up initial game objects and game states.
  • update.js will handle the logic that updates the state of the game when something happens (dropper movement, collisions, game over, etc).
  • config.js will contain configuration settings for the game, such as screen dimensions, physics settings, and global variables.

This HTML setup ensures that when the page is loaded in a browser, all necessary components are initialized in the correct order, starting with the loading of the Phaser framework, followed by specific game scripts that define and control the gameplay. This structure provides a clean and organized way to manage different aspects of game development:

<!DOCTYPE html>
<html lang="en">

<head>
  <meta charset="UTF-8">
  <meta name="viewport" content="width=device-width, initial-scale=1.0">
  <title>Suika Clone</title>
  <link rel="stylesheet" href="style.css">
</head>

<body>
  <div id="gameContainer"></div>
  <script src="https://cdn.jsdelivr.net/npm/[email protected]/dist/phaser.min.js"></script>
  <script src="preload.js"></script>
  <script src="create.js"></script>
  <script src="update.js"></script>
  <script src="config.js"></script>
</body>

</html>

Constants and Phaser configuration (config.js)

Inside the “config.js” file we will first define a list of game objects, each with a name and a specific radius. These objects include various Halloween-themed items like candies, spiders, and pumpkins. They will be used as the objects to be merged in the game, each one bigger than the previous one.

In the second part of the file, a new Phaser game instance is configured with specific settings such as canvas size, scaling to fit the container while maintaining aspect ratio, and center alignment. The game is set to be transparent and uses the Matter physics engine to manage physical interactions. Essential game functions like preload for asset loading and create for setting up initial game states are also defined:

const objects = [
  { name: "candy", radius: 30 },
  { name: "spider", radius: 35 },
  { name: "eye", radius: 40 },
  { name: "candle", radius: 50 },
  { name: "apple", radius: 65 },
  { name: "hat", radius: 70 },
  { name: "skull", radius: 80 },
  { name: "pumpkin", radius: 90 },
  { name: "cat", radius: 100 },
  { name: "ghost", radius: 110 },
  { name: "cauldron", radius: 120 },
];

new Phaser.Game({
  width: 600,
  height: 1000,
  parent: "gameContainer",
  scale: {
    mode: Phaser.Scale.ScaleModes.FIT,
    autoCenter: Phaser.Scale.Center.CENTER_BOTH
  },
  transparent: true,
  physics: {
    default: "matter",
    matter: {
      debug: false,
    },
  },
  scene: {
    preload: preload,
    create: create
  },
});

Images, music and sounds (assets folder)

We will need some images and sounds. You may use any assets you like, but we are providing the original ones so that you can easily develop the same game. Some examples are shown below, and also a zip file containing all the assets can be downloaded here.

Background and headstone images

Background
Headstone

Score numbers

Objects

Candy
Spider
Eye
Candle
Apple
Hat
Skull
Pumpkin
Cat
Ghost
Cauldron

Background music

Sounds

Match sound (when two objects are merged)
Game over sound (when the stack of objects reaches the ceiling)

Loading the assets (preload.js)

The provided preload function is part of a Phaser game’s lifecycle and is crucial for setting up the initial state of the game as well as loading all necessary assets before the gameplay can begin. This function ensures that all graphical and audio components required for the game are loaded into memory and are accessible during the game to avoid delays and enhance the gaming experience.

In this function, the game starts by initializing essential game state variables such as the score, which is set to zero, and a boolean flag gameOver, set to false, indicating the game is currently active. These are fundamental for tracking gameplay progress and status.

The function then proceeds to load various types of assets:

  1. Images: It loads specific images like the “headstone” and “newgame” graphics from predefined paths within the assets directory. Additionally, it loads a series of images representing numbers (0-9), used for displaying the score on the game interface. Each object defined in the objects array ensures that all visual elements related to gameplay objects are available.
  2. Audio: Three types of audio files are loaded: background music, a sound effect for matching items (used during successful gameplay interactions), and a game-over sound (used to signify the end of the game). This enhances the feedback for the player, contributing to the overall immersive experience of the game.

Overall, the preload function is essential for managing the game’s resources, loading everything needed. This setup allows the game to run more efficiently and provides a seamless player experience by having all necessary assets ready at game start:

function preload() {
  this.score = 0;
  this.gameOver = false;

  this.load.image("headstone", "assets/headstone.png");
  this.load.image("newgame", "assets/new-game.png");

  for (let i = 0; i <= 9; i++) {
    this.load.image(`${i}`, `assets/numbers/${i}.png`);
  }

  for (const object of objects) {
    this.load.image(`${object.name}`, `assets/objects/${object.name}.png`);
  }

  this.load.audio("background-music", "assets/background-music.mp3");
  this.load.audio("match-sound", "assets/match-sound.mp3");
  this.load.audio("game-over-sound", "assets/game-over-sound.mp3");
}

Setting up the headstone with the score, the dropper, and particles and light effects (create.js)

The code inside “create.js” will focus on initializing the game components and configuring interactions in a structured manner within the create function. This function serves as the central setup hub where multiple functions are called to configure specific aspects of the game environment and mechanics.

The game begins with setting up audio elements to enrich the gameplay experience with background music and sound effects for specific actions like matches or game over events. Visual aspects are addressed next, including dynamic lighting effects that follow the cursor, creating an engaging and responsive atmosphere. Additionally, particle systems are configured to visually represent interactions such as collisions, adding a layer of polish to the game dynamics.

Game objects and physical boundaries are established through functions like setupHeadstone, which also configures the visual representation and interaction boundaries within the gameplay area. A crucial gameplay mechanic is introduced with setupCeiling and setupDropper, where objects interact within set limits, and a dropper mechanism is used for object placement, enhancing the interactive component of the game.

Other functionalities include a restart button, allowing players to easily reset the game, thereby improving user experience and engagement. The setupEvents function ties all interactive elements together, enabling the game to respond to user inputs and collisions, ensuring a seamless and dynamic gameplay experience. Overall, this code snippet is fundamental in laying down the mechanics and aesthetic elements of the game, making it ready for engaging and responsive play:

function create() {
  setupAudio.call(this);
  setupLight.call(this);
  setupParticles.call(this);
  setupHeadstone.call(this);
  drawScore.call(this);
  setupCeiling.call(this);
  setupDropper.call(this);
  setupRestartButton.call(this);
  setupEvents.call(this);
}

function setupAudio() {
  this.backgroundMusic = this.sound.add('background-music', { volume: 0.75 }).play({ loop: -1 });
  this.matchSound = this.sound.add('match-sound', { volume: 1.00 });
  this.gameOverSound = this.sound.add('game-over-sound', { volume: 1.00 });
}

// Setup the light at the cursor
function setupLight() {
  this.light = this.lights
    .addLight(this.input.activePointer.x, this.input.activePointer.y, 1000, 0x99ffff, 0.75)
    .setScrollFactor(0);
  this.lights.enable().setAmbientColor(0xdddddd);
}

// Define the particles to be created when a pair of objects collide
function setupParticles() {
  this.particles = this.add.particles(0, 0, objects[0].name, {
    lifespan: 1000,
    speed: { min: 200, max: 350 },
    scale: { start: 0.1, end: 0 },
    rotate: { start: 0, end: 360 },
    alpha: { start: 1, end: 0 },
    gravityY: 200,
    emitting: false
  });
}

function setupHeadstone() {
  // Draw the image of the headstone
  this.add
    .nineslice(0, 0, "headstone")
    .setOrigin(0)
    .setDisplaySize(+this.game.config.width, +this.game.config.height)
    .setPipeline("Light2D")
    .setDepth(-2);

  // Define a box where the score will be drawn at the top of the headstone
  this.scoreBox = this.add.renderTexture(
    +this.game.config.width / 2, 150,
    +this.game.config.width, 100
  ).setScale(0.8);

  // Create a grup of objects to put all the falling objects
  this.objects = this.add.group();

  // Define the limits of the headstone where the objects will be located
  this.matter.world.setBounds(
    65, 0,
    +this.game.config.width - 130, +this.game.config.height - 1
  );
}

// Draw a line to check when the objects reach the top of the headstone
function setupCeiling() {
  this.ceiling = this.matter.add.rectangle(
    +this.game.config.width / 2, 100,
    +this.game.config.width, 200
  );
  this.ceiling.isStatic = true;

  const line = this.add
    .rectangle(160, 200, +this.game.config.width - 320, 2, 0xccccff)
    .setOrigin(0)
    .setAlpha(0.1)
    .setDepth(-2);
  line.postFX.addShine();
  line.postFX.addGlow();
}

// Configure the dropper with the first object and add a glow effect
function setupDropper() {
  this.dropper = this.add.image(this.input.activePointer.x, 0, objects[0].name);
  const glow = this.dropper.postFX.addGlow(0x99ddff);
  this.tweens.addCounter({
    yoyo: true, repeat: -1, from: 1, to: 3, duration: 1000,
    onUpdate: tween => glow.outerStrength = tween.getValue()
  });
  updateDropper.call(this, objects[0]);
}

// When the game is over a button is shown to restart the game
function setupRestartButton() {
  const centerX = this.game.config.width / 2;
  const centerY = this.game.config.height / 2;
  const button = this.add.image(centerX, centerY, "newgame")
    .setScale(0.4)
    .setInteractive({ useHandCursor: true })
    .setVisible(false);

  button.postFX.addGlow(0x000000, 0.75);

  const tweenOptions = scale => ({ targets: button, scale, ease: "Linear", duration: 100 });

  button.on("pointerover", () => this.tweens.add(tweenOptions(0.5)));
  button.on("pointerout", () => this.tweens.add(tweenOptions(0.4)));
  button.on("pointerup", () => restart.call(this));
  this.restartButton = button;
}

// Configure all the events that will be used in the game (dropper and objects collisions)
function setupEvents() {
  this.input.on("pointermove", pointer => moveDropper.call(this, pointer));
  this.input.on("pointerdown", pointer => moveDropper.call(this, pointer));
  this.input.on("pointerup", () => nextObject.call(this));
  this.matter.world.on('collisionstart', event => handleCollisions.call(this, event));
}

Updating the dropper and controlling the objects collisions (update.js)

The “update.js” file will include all the functions to define the dropper mechanism and to implement controls for managing object collisions in the game.

The functions setDropperX and moveDropper handle the positioning of a draggable game object, referred to as the “dropper,” which players can move horizontally. The position is carefully constrained within predefined game boundaries to ensure it does not move outside the playable area. The updateDropper function updates the visual representation of the dropper based on game events, such as selecting different objects to be dropped next, and also includes visual effects like shining to highlight active elements.

Gameplay interaction is further expanded through the addObject function, which introduces new game objects into the scene at specified positions, simulating physical properties like friction and bounce. The nextObject function controls the sequence of objects being introduced, ensuring that gameplay progresses logically and consistently. The scoring system is integrated into various game actions, with the drawScore function rendering the current score visually in a dedicated area, providing immediate feedback on player performance.

Collision handling is crucial in this game setup, as seen in the handleCollisions function. This function manages the effects when two objects of the same type collide, including updating the score, playing sound effects, and possibly escalating to a higher level of complexity by introducing new, more challenging objects. The game’s flow is controlled by the gameOver function, which triggers when certain game-ending conditions are met, handling tasks such as displaying restart options and stopping all ongoing game sounds.

Finally, the restart function allows players to reset the game to its initial state, providing a fresh start and ensuring that the game can be played repeatedly without needing to reload the entire game.

Overall, these functions collectively manage the core mechanics of the game, including object manipulation, scoring, event handling, and game state transitions, creating a dynamic and interactive gaming experience:

function setDropperX(x) {
  const padding = 65;
  const radius = this.dropper.displayWidth / 2;
  const maxWidth = this.game.config.width - radius - padding;
  x = Math.max(radius + padding, Math.min(x, maxWidth));
  this.dropper.setX(x);
}

// Moves the dropper when the event "pointermove" happens
function moveDropper(pointer) {
  setDropperX.call(this, pointer.x);
  this.light.setPosition(pointer.x, pointer.y);
}

// Updates the image of the dropper when the event "pointerup" happens
function updateDropper(object) {
  this.dropper
    .setTexture(object.name)
    .setName(object.name)
    .setDisplaySize(object.radius * 2, object.radius * 2)
    .setY(object.radius + 205);
  setDropperX.call(this, this.input.activePointer.x);

  // Check which object is the same as the one in the dropper and make it shine
  this.objects.getChildren().forEach((gameObject) => {
    if (gameObject instanceof Phaser.GameObjects.Image) {
      gameObject.postFX.clear();

      if (gameObject.name === object.name) gameObject.postFX.addShine();
    }
  });
}

// Renders the score inside the box defined previously
function drawScore() {
  this.scoreBox.clear();
  const chars = this.score.toString().split("");

  const textWidth = chars.reduce((acc, c) => acc + this.textures.get(c).get().width, 0);

  let x = (this.scoreBox.width - textWidth) / 2;

  chars.forEach(char => {
    this.scoreBox.drawFrame(char, undefined, x, 0);
    x += this.textures.get(char).get().width;
  });
}

function addObject(x, y, object) {
  this.objects.add(this.matter.add
    .image(x, y, object.name)
    .setName(object.name)
    .setDisplaySize(object.radius * 2, object.radius * 2)
    .setCircle(object.radius)
    .setFriction(0.005)
    .setBounce(0.2)
    .setDepth(-1)
    .setOnCollideWith(this.ceiling, () => gameOver.call(this)));
}

// Creates and puts a new object on the headstone
function nextObject() {
  if (!this.dropper.visible || this.gameOver) return;

  this.dropper.setVisible(false);
  this.time.delayedCall(500, () => this.dropper.setVisible(!this.gameOver));

  addObject.call(this,
    this.dropper.x, this.dropper.y,
    objects.find(object => object.name === this.dropper.name)
  );

  updateDropper.call(this, objects[Math.floor(Math.random() * 5)]);
}

// Function executed when two objects of the same type collide
function handleCollisions(event) {
  for (const { bodyA, bodyB } of event.pairs) {
    if (bodyA.gameObject?.name === bodyB.gameObject?.name) {
      if (navigator.vibrate) navigator.vibrate(50);
      
      const objectIndex = objects.findIndex(object => object.name === bodyA.gameObject.name);
      if (objectIndex === -1) return;

      this.score += (objectIndex + 1) * 2;
      drawScore.call(this);

      bodyA.gameObject.destroy();
      bodyB.gameObject.destroy();

      this.particles
        .setTexture(objects[objectIndex].name)
        .emitParticleAt(bodyB.position.x, bodyB.position.y, 10);

      this.matchSound.play();
      
      const newObject = objects[objectIndex + 1];
      if (!newObject) return;

      addObject.call(this, bodyB.position.x, bodyB.position.y, newObject);
      return;
    }
  }
}

function gameOver() {
  this.gameOver = true;
  this.restartButton.setVisible(true);
  this.dropper.setVisible(false);
  this.game.sound.stopAll();
  this.gameOverSound.play({ loop: -1 });
}

function restart() {
  this.score = 0;
  this.gameOver = false;
  this.game.sound.stopAll();
  this.scene.restart();
}

Proposed exercise: Using your own assets

Create a new version of the game using your own assets (images, and sounds), and even including more objects. You can also change any other things you like.

Do not forget to create all the files required to run the code in this unit:

  • styles.css
  • index.html
  • preload.js
  • create.js
  • update.js
  • config.js
  • assets folder

You may find many free assets in OpenGameArt.

Enjoy the game!

You can enjoy playing this wonderful game online here.