Phaser. Unit 2. A bigger world

Introduction

In this unit we are going to expand our world with a whole different scene. We will use the game developed in the previous unit so that by modifying or adding some code, we will have double the entertainment than before 🙂

The new assets

These are the new assets that we will use to build the next scene (you can download all the assets here):

An arrow to jump to the next scene
Flying stars that will increase the score
Dead trees
Flying dragons trying to kill the player
Sound to be played after collecting a star

Expanding the world

The first thing we are going to do is creating a wider sky and platform, using new colors for the new scene.

Proposed exercise: Expanding sky and platform

First check that you have a working game on your domain. After that, follow the instructions below, and upload the new code and the new assets to your domain (you can get all the assets from this link). Finally, check the results in your browser.

Now you should have an arrow on the right corner, at the top of the screen, so that you can easily jump to the next scene. Your new game should look now like this one.
  1. Insert at the top of your code a new constant with the new size of the world (double than before):
const maxWorldWidth = worldWidth * 2;
  1. Modify the function “createWorld()” so that both the camera and world bounds use this new constant, and also insert the new sky and the new platform:
function createWorld() {
    this.cameras.main.setBounds(0, 0, maxWorldWidth, screenHeight);
    this.physics.world.setBounds(0, 0, maxWorldWidth, screenHeight);

    ...

    // New sky
    this.add.rectangle(worldWidth, 0, worldWidth, screenHeight, 0xff6600).setOrigin(0);

    // New platform
    platform2 = this.add.rectangle(worldWidth, screenHeight, worldWidth, platformHeight, 0x006600).setOrigin(0, 1);
    this.physics.add.existing(platform2);
    platform2.body.setCollideWorldBounds(true);
}
  1. Activate the collision between the player and the new platform. This can be done with a single line inside the “createPlayer()” function:
function createPlayer() {
    ...
    this.physics.add.collider(player, platform2);
}
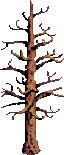
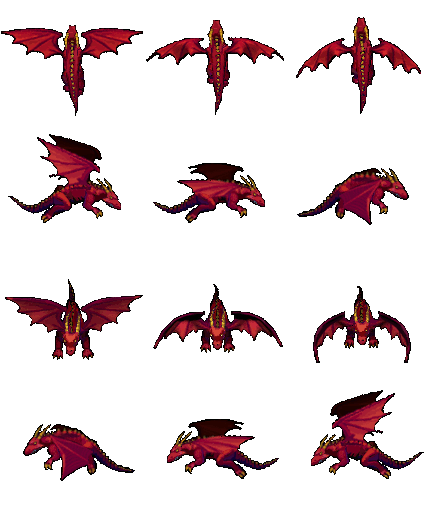
  1. Load the new assets (the button to jump to the next scene, the dead tree, the stars to be collected, the sound to be played when collecting the stars, and the sprite sheet of the flying dragon) inside the “preload()” function:
function preload() {
    ...
    this.load.image('arrow', 'assets/arrow.png');
    this.load.image('tree2', 'assets/tree2.png');
    this.load.image('star', 'assets/star.png');
    this.load.audio('bell2', 'assets/ding2.mp3');
    this.load.spritesheet('dragon', 'assets/dragon.png', { frameWidth: 144, frameHeight: 128 });
}
  1. Insert a new function to display the arrow to jump to the next scene:
function showArrow() {
    this.add.image(screenWidth, 0, 'arrow').setOrigin(1, 0).setScale(2).setScrollFactor(0).setInteractive().on('pointerdown', () => player.x = (player.x + worldWidth) % maxWorldWidth);
}
  1. And finally you must execute that code, just by adding a new line to the “create()” function:
function create() {
    ...            
    showArrow.call(this);
}

Proposed exercise: A big tree between the two scenes

To achieve a better transition between one scene to the other, we will put a dead tree in the middle. You just need to insert one line of code at the end of the “createWorld()” function:

You can see the expected result here.
function createWorld() {
    ...
    this.add.image(worldWidth, 0, 'tree2').setOrigin(0.5, 0).setDisplaySize(screenWidth/5, screenHeight);
}

Proposed exercise: Changing the new scene’s colors

Choose any colors you like for the new scene, and change the colors of both the sky and the platform. You only have to change a couple of values inside the function “createWorld()”.

You can use a color picker to get the values of the new colors in hexadecimal notation.

More trees, more fires, more clouds…

Now we have to show the fires and the clouds in the new scene. And to change even more the appearance of the new scene, we will not change only the colors but also the background images, by using new trees.

Proposed exercise: More trees

Update the constant with the number of trees to be displayed, and also, add a new line to the “createTree()” function so that lots of new trees are shown inside the new scene.

You can see the expected result here.
  1. Update the constant to show as many trees as you like:
const numTrees = 100;
  1. Create new trees in the new scene (you will notice that these trees are shown at ‘x+worldWidth’ position, and also the ‘scale’ is adjusted for the new image):
function createTree() {
    ...
    this.add.image(x + worldWidth, y, 'tree2').setOrigin(1).setScale(scale * 2);
}

Proposed exercise: More fires

Update the constant with the number of fires to be displayed, and also, update the “createFire()” function to use the constant ‘maxWorldWidth’ as the limit to generate the fires.

You can see the expected result here.
  1. Update the constant to show as many fires as you like:
const numFires = 50;
  1. Update the following line to use ‘maxWorldWidth’ constant instead:
function createFire() {
    const x = Phaser.Math.Between(screenWidth/2, maxWorldWidth);
    ...
}

Proposed exercise: More clouds

Update the constant with the number of clouds to be displayed, and also, update the “createClouds()” function to use the constant “maxWorldWidth” as the limit to generate the clouds.

You can see the expected result here.
  1. Update the constant to show as many clouds as you like:
const numClouds = 100;
  1. Update the following line to use “maxWorldWidth” constant instead:
function createCloud() {
    const x = Phaser.Math.Between(0, maxWorldWidth);
    ...
}

The new moving objects (stars and dragons)

Now we will add to the new scene a couple of moving objects: stars and dragons. After collecting a star, a new sound will be played, and as a new feature, we will be protected for several seconds so that in case we hit a killing object, we remain unaffected. About the dragons, we may get the same behaviour as if we hit the bombs or the fires.

Proposed exercise: Adding the stars

Add or modify all the required code that will be in charge of creating the stars in the new scene and that will also handle the events related to the new objects (playing sound, increasing lives, etc.). You will have to follow the steps below.

You can see the expected result here.
  1. Create the new variables (the number of stars to be displayed, and the timeout to be protected when you are hit by the bombs, the fires, or the dragons):
const numStars = 50;
var timeout = false;
  1. Initialize the sound to be played when collecting the stars, just by adding a single line inside the existing “initSounds()” function. You might also need to adjust the volume by using the right value from 0.1 to 1:
function initSounds() {
    bell2 = this.sound.add('bell2', { volume: 0.2 });
    ...
}
  1. Add the new functions to your code. The “collectStar()” function will print each star, the “protect()” function will activate a player’s protection to avoid being killed for a while, and the “collectStar()” function will contain the code be executed each time you collect a star:
function createStar() {
    const x = Phaser.Math.Between(worldWidth, worldWidth * 2);
    const vX = Phaser.Math.Between(-velocityX, velocityX);
    const vY = Phaser.Math.Between(velocityY/2, velocityY);
    let star = this.physics.add.image(x, 0, 'star').setScale(0.5).setBounce(1).setCollideWorldBounds(true).setVelocity(vX, vY);
    star.body.setAllowGravity(false);
    this.physics.add.collider(star, platform);
    this.physics.add.collider(star, platform2);
    this.physics.add.collider(player, star, collectStar, null, this);
}

function protect(color) {
    player.setTint(color);
    if (timeout) clearTimeout(timeout);
    timeout = setTimeout(() => { timeout=false; player.clearTint() }, 3000);
}

function collectStar(player, star) {
    bell2.play();
    star.destroy();
    createStar.call(this);

    protect(0xFFFF00);

    score += 10;
    if (score % 100 == 0) lives++;
    showScore();
}
  1. And finally insert the loop to create all the stars at once inside the “create()” function:
funtion create() {
    ...
    for (i = 0; i < numStars; i++) createStar.call(this);
}

Proposed exercise: Adding the dragons

Add or modify all the required code that will be in charge of creating the dragons in the new scene and that will also handle the events related to them (playing sound, decreasing lives, etc.). You will have to follow the steps below.

You can see the expected result here.
  1. Insert at the top of your code a new constat to set the number of dragons you would like to print:
const numDragons = 25;
  1. Add the “flying” animation to the function “createAnimations()”:
function createAnimations() {
    ...
    // Dragon
    this.anims.create({
        key: 'flying',
        frames: this.anims.generateFrameNumbers('dragon', { start: 0, end: 11 }),
        frameRate: 5,
        repeat: -1
    });
}
  1. Add the new functions “createDragon()” and “hitDragon()” to your code, to display each dragon and to perform any action we want to be done after being hit:
function createDragon() {
    const x = Phaser.Math.Between(worldWidth, worldWidth * 2);
    const y = Phaser.Math.Between(0, screenHeight - platformHeight);
    const v = Phaser.Math.Between(velocityY/2, velocityY);
    let dragon = this.physics.add.sprite(x, y, 'dragon').setOrigin(1).setSize(72, 64).setScale(2).anims.play('flying', true).setBounce(1).setVelocity(0, v);
    dragon.body.setAllowGravity(false).setCollideWorldBounds(true);
    this.physics.add.collider(dragon, platform2);
    this.physics.add.collider(player, dragon, hitDragon, null, this);
}

function hitDragon(player, dragon) {
    dead.play();
    lives--;
    showScore();

    protect(0xFF0000);

    if (lives == 0) {
        this.physics.pause();
        gameOver = true;
        this.add.image(screenWidth/2, screenHeight/2, 'restart').setScale(5).setScrollFactor(0).setInteractive().on('pointerdown', () => location.reload());
    }
    else {
        dragon.destroy();
    }
}
  1. And finally, add a new loop to the “create()” function to print all the dragons at once:
function create() {
    ...
    for (i = 0; i < numDragons; i++) createDragon.call(this);
}

Enjoy the game!

You may enjoy playing this wonderful game online here.

Phaser. Unit 1. Your first game

Introduction

Phaser is one of the best frameworks to develop Desktop and mobile HTML games. You will be able to create 2D games and make them available to everyone with a simple domain with less than 10MB storage capacity. Also, it is fast, free, and opensource!

You may find more information at the Phaser official page and you may also have a look at some interesting demonstrations at the examples page.

HTML and CSS code

The first thing we should do is linking the Phaser library. We will use the last version at the time this unit has been written:

<script src="https://cdn.jsdelivr.net/npm/[email protected]/dist/phaser.min.js"></script>

After that we are going to insert some CSS code to remove any margin and padding, and also to remove the scrollbars, so that all the window size is used when the game is started:

html, body {
    margin: 0px;
    padding: 0px;
    overflow: hidden;
    height: 100%;
} 

And finally we are going to use a single file to put all the code inside. This is going to be the basic structure of the “.html” file:

<!doctype html>
<html lang="en">
<head>
    <meta charset="UTF-8" />
    <title>First game with Phaser 3</title>
    <script src="https://cdn.jsdelivr.net/npm/[email protected]/dist/phaser.min.js"></script>
    <style type="text/css">
        html, body {
            margin: 0px;
            padding: 0px;
            overflow: hidden;
            height: 100%;
        }
    </style>
</head>
<body>
    <script type="text/javascript">
        ...
    </script>
</body>
</html>

Constants

We are going to define some constants at the beginning of the code so that we can easily change the game appearance, difficulty, and some other parameters:

// The game will use the whole window
const screenWidth = window.innerWidth;
const screenHeight = window.innerHeight;

// The world width will be 10 times the size of the screen
const worldWidth = screenWidth*10;

// Height of platform and joystick size (at the bottom)
const platformHeight = screenHeight/6;
const joystickSize = platformHeight/3;

// Both x and y velocity (depending on the screen size) 
const velocityX = screenWidth/4;
const velocityY = screenHeight/2;

// Number of clouds, tries, fires and coins
const numClouds = 50;
const numTrees = 100;
const numFires = 25;
const numCoins = 50;

Phaser configuration and other variables

Following the constants we are going to create some variables so keep all the information about the game and also to start the initialization of Phaser:

var config = {
    type: Phaser.AUTO,
    width: screenWidth,
    height: screenHeight,
    physics: {
        default: 'arcade',
        arcade: {
            gravity: { y: velocityY }
        }
    },
    scene: {
        preload: preload,
        create: create,
        update: update
    }
};

var platform, player, bell, dead;
var cursors, joyStick;
var score = 0, lives = 5, scoreText = null;
var gameOver = false;

// Init Phaser
var game = new Phaser.Game(config);

The assets (images, sprites and sounds)

We will need some images, sprites and sounds. You may use any assets you like, but we are also providing some examples so that you can easily start testing (they can also be downloaded here):

Images

Cloud

Tree
Bomb
Restart button

Sprites (player and animated objects)

Player
Fire
Coin

Sounds and music

When the player gets a coin
When the user gets hurt by a bomb or a fire
Background music always playing

Loading all the assets

So that we can use all those images, sprites and music, they have to be loaded previously. That is the purpose of the “preload()” function. We will also include here the initialization of the joystick so that we can use it in another section of this unit.

Proposed exercise: Game initialization

Create a specific folder for your game in your domain to put all the code and assets inside. After that, create an “index.html” inside that folder with the code below, and also create an “assets” folder to put all the images and sounds, which can be downloaded here. After uploading everything to your domain, test the game using the url of that folder in your browser, and you should get a full black screen. Click on it and the background music should start playing.

You can see the result here (you can also look at the source code by pressing Ctrl+U).
<!doctype html>
<html lang="en">

<head>
    <meta charset="UTF-8" />
    <title>First game with Phaser 3</title>
    <script src="https://cdn.jsdelivr.net/npm/[email protected]/dist/phaser.min.js"></script>
    <style type="text/css">
        html, body {
            margin: 0px;
            padding: 0px;
            overflow: hidden;
            height: 100%;
        }
    </style>
</head>

<body>
    <script type="text/javascript">
        const screenWidth = window.innerWidth;
        const screenHeight = window.innerHeight;

        const worldWidth = screenWidth * 10;

        const platformHeight = screenHeight / 6;
        const joystickSize = platformHeight / 3;

        const velocityX = screenWidth / 4;
        const velocityY = screenHeight / 2;

        const numTrees = 100;
        const numClouds = 50;
        const numFires = 25;
        const numCoins = 50;

        var config = {
            type: Phaser.AUTO,
            width: screenWidth,
            height: screenHeight,
            physics: {
                default: 'arcade',
                arcade: {
                    gravity: { y: velocityY }
                }
            },
            scene: {
                preload: preload,
                create: create,
                update: update
            }
        };

        var platform, player, bell, dead;
        var cursors, joyStick;
        var score = 0, lives = 5, scoreText = null;
        var gameOver = false;

        var game = new Phaser.Game(config);

        function preload() {
            // Load joyStick
            this.load.plugin('rexvirtualjoystickplugin', 'https://cdn.jsdelivr.net/npm/[email protected]/dist/rexvirtualjoystickplugin.min.js', true);
       
            // Load images
            this.load.image('cloud', 'assets/cloud.png');
            this.load.image('tree', 'assets/tree.png');
            this.load.image('bomb', 'assets/bomb.png');
            this.load.image('restart', 'assets/restart.png');
            this.load.spritesheet('dude', 'assets/dude.png', { frameWidth: 32, frameHeight: 48 });
            this.load.spritesheet('fire', 'assets/fire.png', { frameWidth: 32, frameHeight: 32 });
            this.load.spritesheet('coin', 'assets/coin.png', { frameWidth: 32, frameHeight: 32 });

            // Load sounds and music
            this.load.audio('bell', 'assets/ding.mp3');
            this.load.audio('dead', 'assets/dead.mp3');
            this.load.audio('music', 'assets/music.mp3');
        }

        function initSounds() {
            bell = this.sound.add('bell');
            dead = this.sound.add('dead');
            this.sound.add('music', {volume:0.5}).play({ loop: -1 });
        }

        function create() {
            initSounds.call(this);
        }

        function update() {
        }
    </script>
</body>
</html>

Proposed exercise: Using your own music

Download any other music file you like to use it as a background music and change the JavaScript code inside the “preload()” function to set the file name accordingly. Also in the “initSounds()” function you will find that you may change the volume of the music (volume:0.5). Try changing that value from 0.1 to 1 and you will notice that the volume of the music will also change.

You may find in the following sites some free images and sounds which you can download and use for your own game:

Sky and platform

Once we have initialized Phaser and after loading all the assets, we can go ahead and paint something on the screen. We are going the create a couple of rectangles filled with any color we like, and this way we will create the sky and the platform.

We will use the following colors (you may find more information about colors in hexadecimal notation here):

  • Sky (light blue): 0x87CEEB
  • Platform (brown): 0xB76743

Proposed exercise: Adding sky and platform

Add the function “createWorld()” (provided below) to your code, and modify the calling function “create()” so that it is called when the game is started (also shown below). Finally test everything in your browser from your domain. You may also change the colors of both the platform and the sky.

You may easily get the hexadecimal code of any color you like with a simple color picker. About the music, do not forget to click on the screen after loading the game (the music will not start playing unless the browser gets the focus). Also, you can see the result here (you can look at the source code by pressing Ctrl+U).
  1. This is the new function you have to insert in your code to create the world:
function createWorld() {
    this.cameras.main.setBounds(0, 0, worldWidth, screenHeight);
    this.physics.world.setBounds(0, 0, worldWidth, screenHeight);

    // Sky
    sky = this.add.rectangle(0, 0, worldWidth, screenHeight, 0x87CEEB).setOrigin(0);

    // Platform
    platform = this.add.rectangle(0, screenHeight, worldWidth, platformHeight, 0xB76743).setOrigin(1);
    this.physics.add.existing(platform);
    platform.body.setCollideWorldBounds(true);
}
  1. Do not forget to update the “create()” function to create the world (sky, platform, camera, and world boundaries). This is the only line you should add to that function:
function create() {
    ...
    createWorld.call(this);            
}

Objects in background (trees)

We will first create the trees so that they remain in the background. We may create all of them using the same image. We will just change the size of the trees by scaling them randomly, and we will also choose a random position for each of them. Finally we will use a loop to print as many trees as we like.

Proposed exercises: Adding the trees

Add the code below to your file and check the results. After that, change the value of the constant “numTrees” (at the top of your code) and also the value of the “scale” variable to check how easily you can customize your game. Refresh the page several times and you will notice that the generated trees have random sizes and they also appear in random positions. Finally, look for another image (a tree or any other object) and change the code accordingly to use your own image.

You can see the result here (you can look at the source code by pressing Ctrl+U). Also, as listed above, you may find many free assets in OpenGameArt.
  1. This is the new function you have to insert in your code to create each tree:
function createTree() {
    const x = Phaser.Math.Between(0, worldWidth);
    const y = screenHeight-platformHeight;
    const scale = Phaser.Math.FloatBetween(0.5, 2);
    this.add.image(x, y, 'tree').setOrigin(1).setScale(scale);
}
  1. Do not forget to update the “create()” function to create all the trees. You only need one single line to create all trees at once using a loop:
function create() {
    ...
    for(i=0; i<numTrees; i++) createTree.call(this);          
}

The animations (sprites)

We will use sprites to create the player and the animated objects. For example, let’s have a look at the player:

Sprite with three player animations

We may appreciate that we have 9 pictures divided into 3 different groups. This way, we may easily create all three animations:

  • Left: Pictures from 0 to 3
  • Turn: Picture number 4
  • Right: Pictures from 5 to 8

Controlling the player’s animations

So that this game can be used in both desktop and mobile devices, we have to initialize both the cursor keys and the joystick. Once this is done, we must change the player’s velocity and the current animation when the user presses the keys or moves the joystick. In the next exercise we will first define the animations inside the “createAnimations()” function, and after that we will go ahead with the “createPlayer()” function, where we will display the player. We will finally include in the “update()” function some conditions to adjust the player’s speed and current animation.

Proposed exercise: Adding the player

Add the code below to your game and check both the player animations and movements. After that, look for another sprite and change the code accordingly to use your own sprite. Finally, change the values of the constants “velocityX” and “velocityY” (at the top of your code) and check the results.

You can see the result here (you can look at the source code by pressing Ctrl+U). Also, as listed above, you may find many free assets in OpenGameArt and choose other sprites you like.
  1. These are the new functions you have to insert in your code to create the animations and initialize everything related to the player:
function createAnimations() {
    // Player
    this.anims.create({
        key: 'left',
        frames: this.anims.generateFrameNumbers('dude', { start: 0, end: 3 }),
        frameRate: 10,
        repeat: -1
    });
    this.anims.create({
        key: 'turn',
        frames: [{ key: 'dude', frame: 4 }]
    });
    this.anims.create({
        key: 'right',
        frames: this.anims.generateFrameNumbers('dude', { start: 5, end: 8 }),
        frameRate: 10,
        repeat: -1
    });
    // Fire
    this.anims.create({
        key: 'burning',
        frames: this.anims.generateFrameNumbers('fire', { start: 0, end: 4 }),
        frameRate: 10,
        repeat: -1
    });
    // Coin
    this.anims.create({
        key: 'rotate',
        frames: this.anims.generateFrameNumbers('coin', { start: 0, end: 7 }),
        frameRate: 10,
        repeat: -1
    });            
}

function createPlayer() {
    player = this.physics.add.sprite(0, screenHeight-platformHeight, 'dude').setOrigin(1).setScale(3).setBounce(0.2).setCollideWorldBounds(true);
    this.physics.add.collider(player, platform);
    this.cameras.main.startFollow(player, true, 0.05, 0.05);
    // Cursor keys and joystick
    cursors = this.input.keyboard.createCursorKeys();
    joyStick = this.plugins.get('rexvirtualjoystickplugin').add(this, {
        x: screenWidth / 2,
        y: screenHeight - joystickSize*1.5,
        radius: joystickSize
    }).on('update', update, this);
}
  1. Also you have to insert some code inside the “update()” function to respond to the cursor keys and the joystick:
function update() {
    if (gameOver) return;

    if (cursors.left.isDown || joyStick.left) {
        player.setVelocityX(-velocityX).anims.play('left', true);
    }
    else if (cursors.right.isDown || joyStick.right) {
        player.setVelocityX(velocityX).anims.play('right', true);
    }
    else {
        player.setVelocityX(0).anims.play('turn');
    }

    if ((cursors.up.isDown || joyStick.up) && player.body.touching.down) {
        player.setVelocityY(-velocityY);
    }
}
  1. And finally do not forget to update the “create()” function to create the animations and the player. You just have to insert a couple of new lines:
function create() {
    ...
    createAnimations.call(this); 
    createPlayer.call(this);
}

The clouds, the score, the fires and the coins

We will create many different objects (clouds, fires and coins) at once using the same images. We will just change the size of the objects by scaling them randomly, and we will use a loop to print as many objects as we like choosing random positions.

Proposed exercises: Adding the clouds

Add the code below to your file and check the results. After that, change the value of the constant “numClouds” (at the top of your code) and also the value of the “scale” variable to check how easily you can customize your game. Refresh the page several times and you will notice that the generated clouds and also the trees have random sizes and they appear in random positions. Finally, look for another image (a cloud or any other object) and change the code accordingly to use your own image.

You can see the result here (you can look at the source code by pressing Ctrl+U). Also, as listed above, you may find many free assets in OpenGameArt and choose the images you like.
function createCloud() {
    const x = Phaser.Math.Between(0, worldWidth);
    const y = Phaser.Math.Between(0, screenHeight-platformHeight*2);
    const scale = Phaser.Math.FloatBetween(0.5, 1.5);
    this.add.image(x, y, 'cloud').setScale(scale);
}
function create() {
    ...
    for(i=0; i<numClouds; i++) createCloud.call(this);
}

Proposed exercise: Adding the score

Using the global variables, we may easily show both the score and number of remaining lives. Add the code below to your game and check the results. After that, change the value of the constant “numLives” (at the top of your code) and also the value of the “scale” variable to check how easily you can customize that text.

You can see the result here (you can look at the source code by pressing Ctrl+U).
function showScore() {
    if (!scoreText) scoreText = this.add.text(16, 16, '', { fontSize:(screenWidth/20)+'px', fill:'#000' }).setScrollFactor(0);
    scoreText.setText('Score:' + score + ' / Lives:' + lives);
}
function create() {
    ...
    showScore.call(this);
}

Proposed exercises: Adding the fires and the coins

Add the code below to your game and check the results. After that, change the value of the constants “numFires” and “numCoins” (at the top of your code) and also the value of the “scale” variables to check how easily you can customize your game. Finally, look for another sprites (fires, coins, or any other objects) and change the code accordingly to use your own sprites.

You may click here to see how the game looks like. As listed above, you may find many free assets in OpenGameArt.
function createFire() {
    const x = Phaser.Math.Between(screenWidth/2, worldWidth);
    const y = Phaser.Math.Between(screenHeight-platformHeight, screenHeight);
    let fire = this.physics.add.sprite(x, y, 'fire').setOrigin(1).setScale(3).setImmovable(true).anims.play('burning', true)
    fire.body.setAllowGravity(false);
    this.physics.add.collider(player, fire, hitBombOrFire, null, this);   
}

function createCoin() {     
    const x = Phaser.Math.Between(screenWidth/2, worldWidth);
    const bounce = Phaser.Math.FloatBetween(0.1, 0.5);
    let coin = this.physics.add.sprite(x, 0, 'coin').setOrigin(1).setScale(3).setBounce(bounce).anims.play('rotate');
    coin.body.setOffset(0, -10);
    this.physics.add.collider(coin, platform);
    this.physics.add.overlap(player, coin, collectCoin, null, this);
}

function createBomb() {
    const x = Phaser.Math.Between(0, worldWidth);
    const v = Phaser.Math.Between(-velocityX, velocityX);
    let bomb = this.physics.add.image(x, 0, 'bomb').setScale(2).setBounce(1).setCollideWorldBounds(true).setVelocity(v, velocityY);
    bomb.body.setAllowGravity(false);
    this.physics.add.collider(bomb, platform);     
    this.physics.add.collider(player, bomb, hitBombOrFire, null, this);   
}

function collectCoin(player, coin) { 
    bell.play();
    coin.destroy();
    createCoin.call(this);
    createBomb.call(this);    

    score += 10;
    if (score % 100 == 0) lives++;
    showScore();
}

function hitBombOrFire(player, thing) {
    dead.play();
    lives--;
    showScore();
    player.setTint(0xff0000).anims.play('turn');

    if (lives == 0) {
        this.physics.pause();
        gameOver = true;
        this.add.image(screenWidth/2, screenHeight/2, 'restart').setScale(5).setScrollFactor(0).setInteractive().on('pointerdown', ()=>location.reload());                
    }
    else {
        thing.destroy();
        setTimeout(()=>player.clearTint(), 3000);
    }
}
function create() {
    ...
    for(i=0; i<numCoins; i++) createFire.call(this);
    for(i=0; i<numCoins; i++) createCoin.call(this);
}

Enjoy the game!

You may enjoy playing this wonderful game online here.